Bookbinding is a timeless craft that combines creativity and precision to transform loose pages into a durable, cohesive book. Central to this process is creating a well-made book spine, which plays a crucial role in the book’s function and aesthetics. The spine provides structural support, ensuring that the book remains intact over time. Additionally, it serves as a display area for essential details such as the title and author’s name, making it easily recognizable when placed on a shelf. A carefully designed spine not only enhances the book’s visual appeal but also ensures it is practical and user-friendly.
This article focuses on how to make book spine with a professional finish, offering a step-by-step guide for those creating homemade or self-published books. Whether you are preserving memories or sharing stories, crafting a sturdy and attractive spine is key to producing a polished final product.

Understanding the Purpose and Design of a Book Spine
The book spine serves both functional and aesthetic purposes, making it an essential component of any book. Structurally, the spine holds the pages intact, ensuring the book remains durable and easy to use over time. It also plays a significant role in the book’s visual identity, often displaying the title, the author’s name, and sometimes the publisher’s logo. A well-thought-out book spine design provides both practicality and an attractive appearance that catches a reader’s eye on a bookshelf.
Design Considerations
When creating a spine, several design elements come into play. The width of the spine is determined by the number of pages and the thickness of the paper, ensuring the book holds its form. Text orientation is another critical factor; while vertical text is standard for novels, horizontal text is often used for coffee table books or children’s books. These decisions greatly influence the overall readability and appeal of the finalized book.
Materials for Book Spines
Choosing the right materials is equally important. Standard options include cardstock, fabric, leather, or reinforced paper. These materials balance durability and flexibility, withstanding regular handling while maintaining the book’s shape. A thoughtful combination of design and material keeps the book’s spine both practical and visually appealing.
Calculating the Spine Width

Determining the spine width is crucial for designing a book that looks professional and functions well. The spine width depends primarily on the number of pages and the thickness of the paper used. A simple formula to calculate spine width is:
Spine Width (in inches) = Page Count x Paper Thickness
For example, if a book has 300 pages and the paper thickness is 0.005 inches, the spine width would be:
300 x 0.005 = 1.5 inches
This calculation ensures the spine size accommodates the book’s contents without feeling overly tight or loose.
Accounting for Binding Method
The binding method also affects the final spine size. For perfect binding, additional space is often required for the adhesive layer, which may slightly increase the spine width. On the other hand, sewn binding generally results in a tighter fit, as stitching compresses the pages more efficiently. Always consider the specific binding process to achieve a precise measurement.
Tools for Accurate Measurement
To ensure accuracy, use a ruler or caliper to measure paper thickness and verify spine calculations. Alternatively, online spine width calculators can simplify the process by adding additional design elements. Proper measurements contribute to a flawless final product.
Materials and Tools Needed
Having the right materials and tools is crucial when creating a book with the perfect spine and cover. Below is a list of essential materials and tools required to ensure your bookbinding project is successful.
Essential Materials
- Book Cover Material: Options include cardboard, chipboard, or binder’s board, chosen for their rigidity and durability to form the book’s structure.
- Covering Material: Cloth, leather, or decorative paper provides the external aesthetic and feel of the book, allowing for personalization and a polished appearance.
- Adhesives: PVA glue, glue sticks, or double-sided tape are necessary for assembling and securing various components, ensuring a strong bond.
Required Tools
- Ruler: Useful for precise measurements during cutting and alignment.
- Bone Folder: A versatile tool for creasing, folding, and achieving smooth edges.
- Cutting Mat and Utility Knife: Essential for making clean, accurate cuts to papers and cover materials.
- Brush for Glue Application: This ensures even, consistent adhesive spreading across surfaces.
Optional Decorative Elements
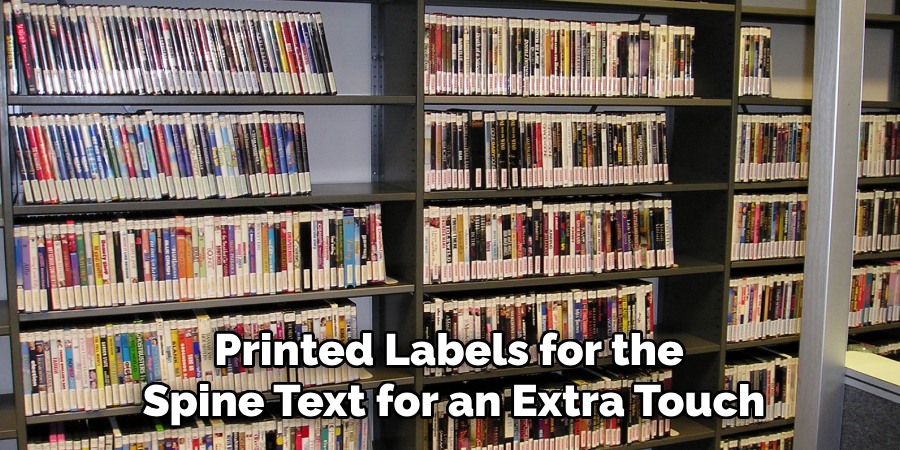
Consider adding decorative elements such as gold foil, embossing powder, or printed labels for the spine text for an extra touch of elegance and customization. These additions can elevate the book’s design and make it uniquely yours.
Having these materials and tools ready before starting your project will streamline the process and produce a professional, high-quality result.
How to Make Book Spine: Steps to Follow
Creating a book spine is a key part of bookbinding that ensures both durability and visual appeal. Follow these steps to craft a professional-looking book spine:
Step 1: Preparing the Cover Board
Cut the cover board to match the spine width and the book’s height. Use a ruler and a sharp cutting tool to ensure precise dimensions. It’s crucial to make sure the edges are straight and smooth, as any irregularities may affect the final fit and appearance of the book.
Step 2: Attaching the Spine to the Covers
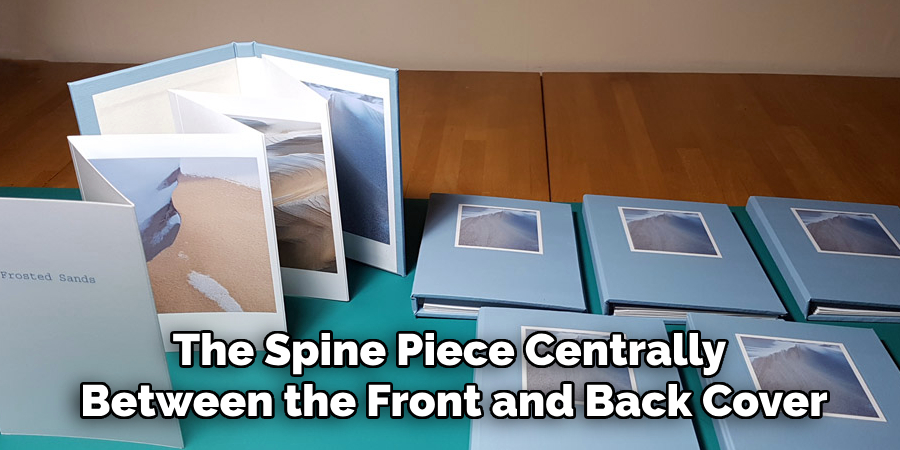
Position the spine piece centrally between the front and back cover boards. Leave a small, even gap—about the thickness of a credit card—on either side of the spine to allow hinge movement. Apply a strong, even adhesive layer to secure the spine to each cover board. Ensure alignment before pressing the pieces together firmly.
Step 3: Wrapping the Spine with Cover Material
Cut a piece of your chosen cover material slightly larger than the spine and covers combined. Apply glue to the exterior of the spine and carefully wrap the material around it, folding over the edges onto the inside. Smooth out any wrinkles or air bubbles with a bone folder or similar tool, ensuring a sleek finish. Allow the adhesive to dry completely.
Step 4: Adding the Spine Text
Add the title and any desired text to the spine using stencils, stamps, or printed labels. Be sure to align the text so it is centered and legible when the book is placed on a shelf. Take your time with this step, as neatness here enhances the book’s overall presentation.
Step 5: Final Assembly
Attach the endpapers to the inside of the covers and firmly secure the text block to the spine and covers. Use clamps or heavy weights to hold the book in place while the glue sets, ensuring everything stays well aligned. Once dry, your book is complete with a sturdy and polished spine.
Decorating and Personalizing the Spine
Once the structural assembly is complete, you can enhance the book’s spine by adding decorative and personal touches. This step elevates the aesthetic appeal and gives the book a unique, identifiable character.
Adding Visual Elements
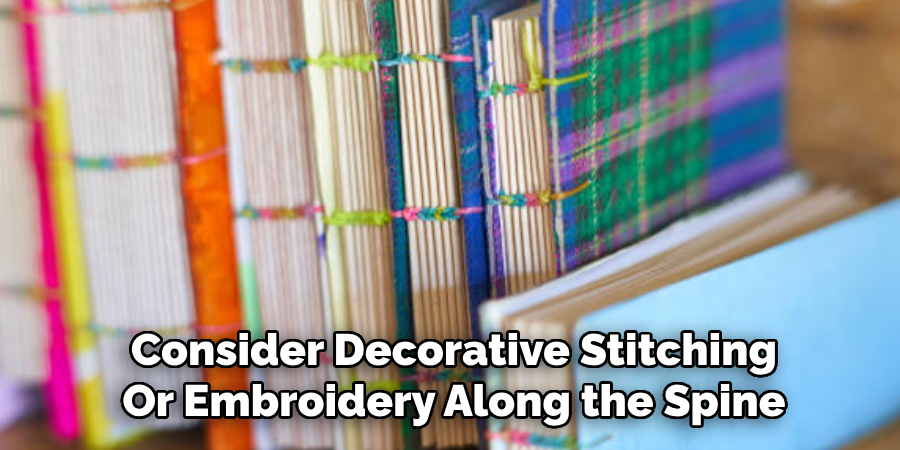
For fabric-covered books, consider decorative stitching or embroidery along the spine. These accents can add a classic, handmade feel to the book. Alternatively, embossing or debossing techniques can be used for textured designs, offering a professional and sophisticated finish. These elements can highlight titles, author names, or abstract patterns that align with the book’s theme.
Labeling Tips
When adding text or labels to the spine, select a font style and size that ensures readability from a distance, such as on a bookshelf. Serif fonts often work well for traditional books, while clean sans-serif fonts fit more modern designs. You can further personalize the spine by incorporating logos or motifs that symbolize the book’s content or its creator.
Protecting the Spine
To preserve the spine’s design and structure, apply a protective layer, such as varnish or a clear adhesive film. This layer minimizes wear and tear, ensuring that the spine remains vibrant and intact over years of use and handling.
Common Mistakes and How to Avoid Them
Incorrect Measurements
One common error when designing a book spine is calculating the spine width inaccurately. This can lead to layouts that don’t fit properly on the printed book. To prevent this mistake, always use the exact measurements provided by your printer, factoring in the number of pages, paper thickness, and binding method. Double-check calculations and consider using online spine width calculators for precision.
Uneven Adhesion
Uneven glue application during binding can result in bubbles, wrinkles, or weak adhesion. To avoid this issue, use a quality adhesive and spread it evenly with a brush or roller. Work in small sections and take your time to ensure complete coverage. Allow the glue to dry properly to avoid compromising the spine’s durability.
Misaligned Text
Misaligned text on the spine can detract from the book’s professional appearance. Use design software with alignment guides or templates to center and straighten the text. Conduct test prints before finalizing the design to ensure everything is aligned as intended.
Additional Tips for a Professional Look
Using High-Quality Materials
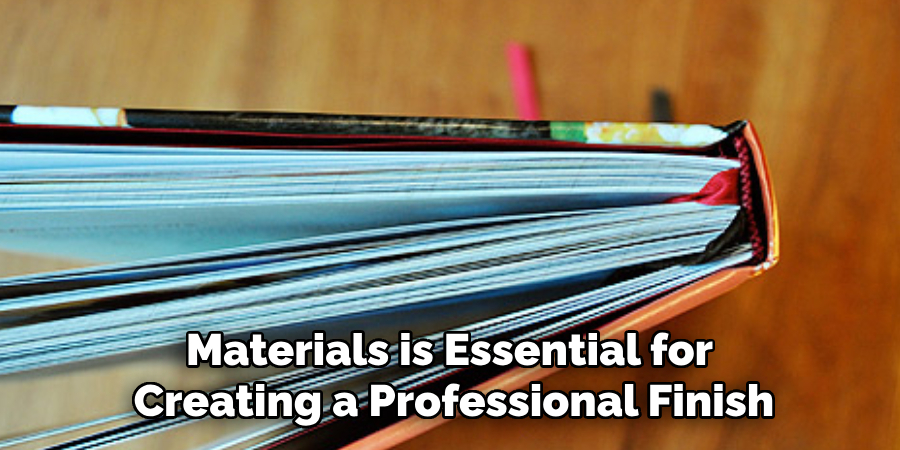
Investing in premium materials is essential for creating a professional finish. Choose durable cover materials, such as cloth, leather, or heavyweight cardstock, to ensure longevity and a polished appearance. High-quality materials enhance the look and improve the book’s resilience over time.
Practicing on Scrap Materials
Before working on the final product, practice your techniques on scrap materials. Whether it’s applying glue, aligning text, or folding, testing beforehand allows you to refine your skills and avoid costly mistakes. This step is beneficial when trying out new tools or methods.
Exploring Creative Designs
A professional look can also be unique and captivating. Experiment with creative elements like textured finishes, embossed details, or handmade embellishments. Mixing traditional techniques with modern trends can elevate the final design and make your book truly one of a kind.
Conclusion
Creating a custom book spine is a rewarding process that combines precision and creativity. By calculating the spine width accurately, choosing high-quality materials, and ensuring proper assembly, you lay the foundation for a professional result. Experimenting with different materials and designs can add a unique flair, making the project truly your own. Whether you’re learning “how to make book spine” for personal satisfaction or professional purposes, the experience of crafting a custom piece is immensely fulfilling. With attention to detail and a willingness to try new ideas, your book spine will stand out as a testament to your skill and creativity.
Professional Focus:
Dedicated to exploring and advancing the intersection of traditional craftsmanship and contemporary design. Specializing in textile arts, woodworking, and mixed media, with a commitment to sustainable practices and the art of upcycling. Focused on creating meaningful connections through craft, empowering individuals to unlock their creativity, and preserving cultural heritage through innovative, hands-on projects.
Vission:
To inspire and empower crafters of all experience levels to unlock their creative potential. Encourages hands-on experimentation, self-expression, and exploration through diverse craft projects.
Education:
- Bachelor of Arts (BA) in Craft and Material Studies – Virginia Commonwealth University.
- Specialized training in various crafting disciplines and material handling.
Recognition:
- Featured in local art exhibits for groundbreaking craft projects
- Partnered with community organizations to host crafting workshops
- Recognized for contributions to sustainable and eco-conscious crafting
Expertise:
Crafting expert with a focus on blending traditional techniques with innovative designs. Specialization:
- Textile arts (weaving, embroidery, fabric dyeing)
- Woodworking and furniture design
- Mixed media and upcycling projects