Crocheting a pot leaf is a creative and fun project that combines crafting skills with a unique design. Whether you’re an experienced crocheter looking for a new challenge or a beginner eager to learn something cool, this guide will help you create your own cannabis-inspired decoration.
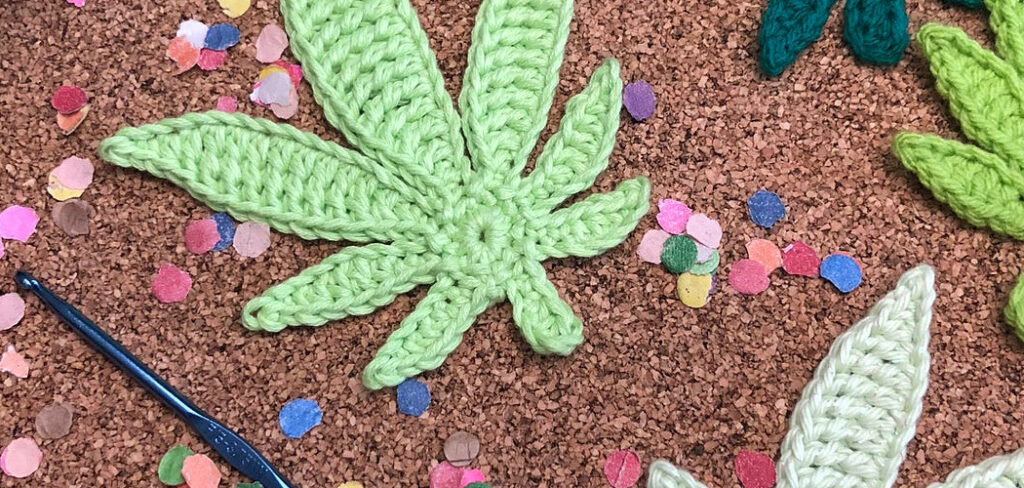
Perfect for adding a touch of personality to your home, making custom gifts, or even accessorizing clothing, this crochet project is sure to stand out. Before we begin, gather your materials and prepare to learn step-by-step instructions on how to crochet a pot leaf to bring this distinctive design to life. If you’re looking to add a unique touch to your projects, this pot leaf crochet pattern free download offers a fun and creative way to express your style.
Materials Needed
Yarn Suggestions
- Green Worsted Weight Yarn
- Dark Green Worsted Weight Yarn
Crochet Hook Suggestions
- Size G/6 (4.25mm) Crochet Hook
Additional Materials
- Scissors
- Tapestry Needle
- Stitch Marker (Optional)
- Paper Clip or Bobby Pin (Optional)
7 Step-by-Step Guidelines on How to Crochet a Pot Leaf
Step 1: Start with a Magic Ring
- Hold your yarn in a loop, then twist it twice to make an X shape.
- Insert your crochet hook through the center of the X and grab the yarn from behind.
- Pull tightly to create a secure ring on your hook.
- This is called a magic ring and it will serve as the base for your pot leaf.

Step 2: Chain Stitch (Ch)
- Create a chain stitch by wrapping the hook over and under the working yarn.
- Pull that wrapped yarn through the loop on your hook to create one chain stitch.
- Repeat this process until you have 8 chain stitches on your hook.
- The number of chains may vary depending on the size of your magic ring and the thickness of your yarn.
Step 3: Single Crochet (Sc)
- Insert your hook into the magic ring, then wrap yarn over and pull up a loop through both loops on your hook. This creates your first single crochet stitch.
- Wrap yarn over and pull through both loops on the hook to complete one single crochet stitch. Repeat this process until you have a total of 8 single crochet stitches in the magic ring.
Step 4: Half Double Crochet (Hdc)
- Wrap your yarn over your hook and insert it into the magic ring.
- Pull up a loop through the first stitch (there will be three loops on your hook).
- Wrap yarn over again and pull through all three loops on your hook.
Step 5: Double Crochet (Dc)
- Wrap your yarn over your hook, then insert it into the magic ring.
- Pull up a loop through the first stitch (there will be three loops on your hook).
- Wrap yarn over again and pull through two of the loops on your hook.
- Wrap yarn over once more and pull through the remaining two loops on your hook.
Step 6: Treble Crochet (Tr)
- Wrap your yarn over twice, then insert your hook into the magic ring.
- Pull up a loop through the first stitch (there will be four loops on your hook).
- Wrap yarn over again and pull through two of the loops on your hook.
- Repeat this step two more times until you have one loop remaining on your hook.
Step 7: Double Treble Crochet (Dtr)
- Wrap your yarn over three times, then insert your hook into the magic ring.
- Pull up a loop through the first stitch (there will be five loops on your hook).
- Wrap yarn over again and pull through two of the loops on your hook.
- Repeat this step three more times until you have one loop remaining on your hook.
Following these steps on how to crochet a pot leaf, you can now add more details to your pot leaf design. You can use different colors of yarn to create a more realistic-looking leaf or add some embellishments such as beads or sequins, for added texture and dimension.
Customization Ideas
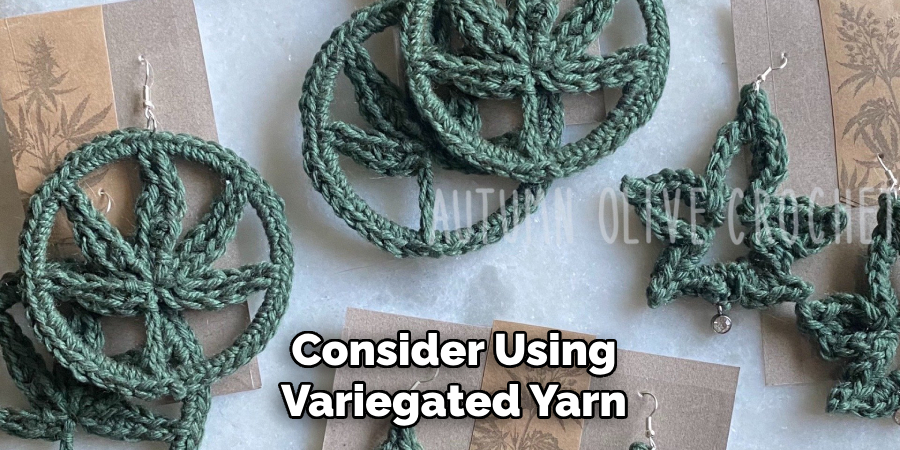
To make your crochet pot leaf truly unique, there are countless ways to personalize your design. Consider using variegated yarn to incorporate multiple shades of green, which can give your leaf a more natural and vibrant appearance. If you’d like to add some sparkle, try working with metallic or glittery yarn. For an artistic touch, you can incorporate contrasting colors along the edges of the leaf or in the center veins.
Adding small embellishments like beads, charms, or even embroidery can further enhance the design and make it stand out. Additionally, stitching your pot leaf onto accessories like tote bags, hats, or scarves can turn it into an eye-catching feature of a wearable item. Customization opens up endless possibilities to infuse your personality into your creation.
Tips for Success
Choose the Right Yarn and Needle
Select yarn that is appropriate for your desired look and texture. A medium-weight yarn works well for beginners, while more intricate threads, like metallic or glittery ones, are ideal for advanced projects. Pair your yarn with the correct needle size to ensure even stitching.
Practice Your Stitches
Before starting your pot leaf design, practice the necessary stitches on a scrap piece of fabric. This will help you perfect your technique and ensure more polished results.
Use Templates or Patterns
To create a consistent shape, use a printed template or pattern as a guide for your stitching. Tracing the pattern lightly onto your fabric can help maintain symmetry.
Work in Good Lighting
Detailed work requires clear visibility. Ensure your workspace is well-lit to avoid straining your eyes and to make intricate stitching easier.
Be Patient and Take Breaks
Embellishing your pot leaf design can be time-consuming. Take regular breaks to avoid fatigue and maintain focus for precise, quality detailing.
Experiment with Creativity
Don’t be afraid to play with colors, textures, and additional adornments like beads or sequins. This will make your design truly unique and reflective of your personal style.
By following these tips, you can create a striking and personalized piece that showcases your creativity and craftsmanship.
Do You Need to Use Professionals?
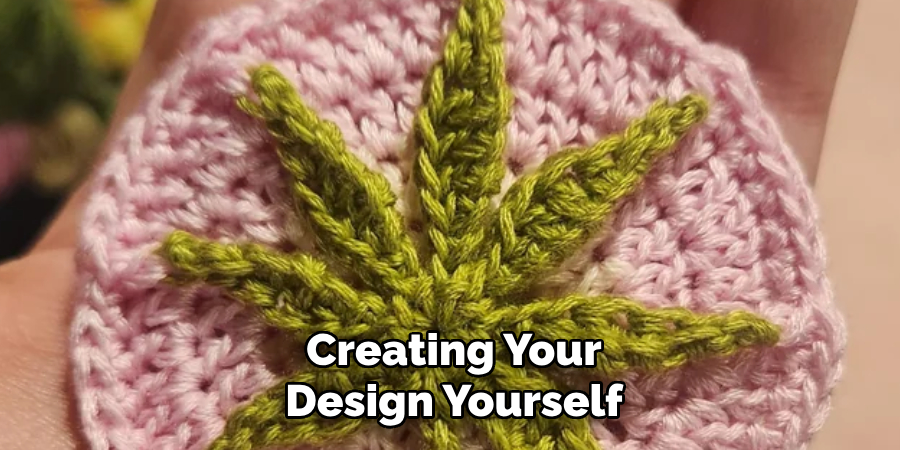
Whether or not to hire professionals for your pot leaf design project largely depends on your goals and skill level. If you’re confident in your artistic abilities and have the necessary tools and materials, creating your design yourself can be a rewarding and cost-effective experience. On the other hand, if you’re aiming for a highly intricate or polished look, seeking help from professional designers or craftsmen might be the best choice.
Professionals possess the expertise and resources to bring your vision to life while saving you time and potential frustration. Ultimately, the decision comes down to your preferences, budget, and the complexity of the design you have in mind.
If you do decide to work with professionals, it’s important to communicate your ideas clearly and provide them with examples or inspiration for the design. This will ensure that they understand your vision and can incorporate it into their work.
Frequently Asked Questions
Q: Can I Use Any Type of Paint for My Pot Leaf Design?
A: It is recommended to use fabric paint or acrylic paint specifically meant for textiles. This will ensure that the design remains vibrant and durable, even after multiple washes.
Q: How Can I Make My Design Stand Out?
A: Experiment with different techniques such as ombre or tie-dye effects, adding glitter or metallic accents, or incorporating different materials like fabric patches or embroidery.
Q: Do I Need Special Tools for This Project?
A: While having a small brush for detailing may be helpful, you can create your design using basic supplies like scissors, tape, and household items like sponges or toothbrushes for creating textured effects. It’s all about being creative and using what you have on hand.
Q: Can I Use Any Type of Fabric?
A: Yes, you can use any type of fabric for tie-dyeing. However, natural fibers like cotton or linen tend to hold the dye better and create more vibrant colors. Synthetic fabrics such as polyester may not absorb the dye as well.
Q: What Techniques Can I Use for Tie-Dyeing?
A: There are many different techniques for creating tie-dye designs. Some popular ones include the spiral, crumple, and accordion folds. You can also experiment with different types of tying materials, like rubber bands or string, to create unique patterns.
Q: How Do I Make Different Colors?
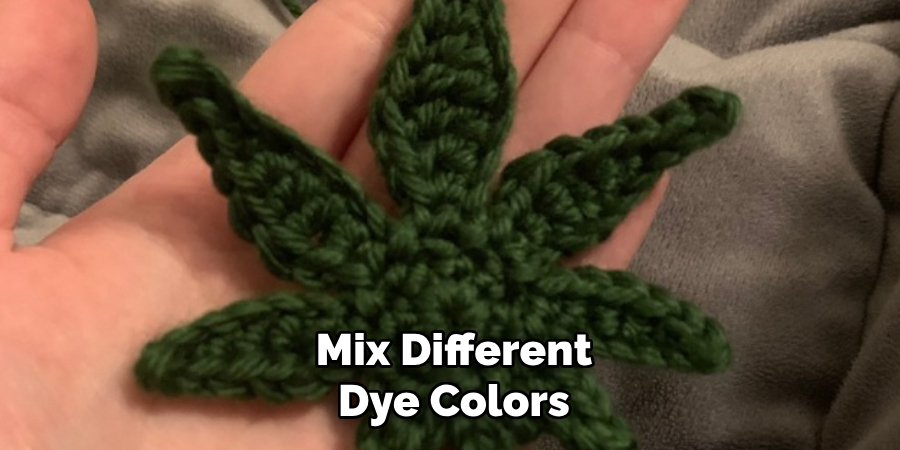
A: To make a variety of colors, you can mix different dye colors together before applying them to the fabric. For example, if you mix blue and yellow dyes, you will get green. You can also use multiple dye colors in separate areas on the fabric to achieve a multi-colored effect.
Conclusion
Tie-dyeing is a fun and creative way to add unique designs and vibrant colors to fabrics. Whether you’re using household items to create textures or experimenting with different types of fabrics, the process encourages self-expression and individuality.
By following the basic guidelines on how to crochet a pot leaf and unleashing your creativity, you can transform ordinary materials into stunning pieces of art. Remember, there’s no right or wrong way to tie-dye—enjoy the experience and make it your own!
Professional Focus:
Dedicated to exploring and advancing the intersection of traditional craftsmanship and contemporary design. Specializing in textile arts, woodworking, and mixed media, with a commitment to sustainable practices and the art of upcycling. Focused on creating meaningful connections through craft, empowering individuals to unlock their creativity, and preserving cultural heritage through innovative, hands-on projects.
Vission:
To inspire and empower crafters of all experience levels to unlock their creative potential. Encourages hands-on experimentation, self-expression, and exploration through diverse craft projects.
Education:
- Bachelor of Arts (BA) in Craft and Material Studies – Virginia Commonwealth University.
- Specialized training in various crafting disciplines and material handling.
Recognition:
- Featured in local art exhibits for groundbreaking craft projects
- Partnered with community organizations to host crafting workshops
- Recognized for contributions to sustainable and eco-conscious crafting
Expertise:
Crafting expert with a focus on blending traditional techniques with innovative designs. Specialization:
- Textile arts (weaving, embroidery, fabric dyeing)
- Woodworking and furniture design
- Mixed media and upcycling projects