The process of how to get plant out of ceramic pot is one that requires careful attention and skill. This is crucial not just for the health and safety of the plant but also to prevent damage to the ceramic pot, which can be both valuable and delicate.

Proper removal of a plant from its ceramic enclosure is essential to maintain the plant’s root system integrity and ensure its continued growth and development in a new environment. This guide will provide a comprehensive overview of the step-by-step process necessary for safely extracting a plant, including the specific tools that will be required, such as pruning shears, a trowel, and protective gloves.
Additionally, we will introduce important safety considerations and precautions to remember throughout the process to ensure a successful transition for the plant and safeguard the caretaker and the ceramic pot from harm.
Preparation
The initial step in how to get a plant out of a ceramic pot involves meticulous preparation, setting the stage for a smooth and successful removal process. This preparation is divided into three key areas: choosing a work area, gathering the necessary tools, and watering the plant beforehand.
A. Selecting a Suitable Work Area
Selecting the right work area is crucial. The space should be clean to prevent plant roots contamination and stable to avoid accidents during the process. An ideal surface would be a sturdy table or bench covered with a cloth or newspaper to catch any soil spillage. This setup not only protects the underlying surface but also makes clean-up easier.
B. Gathering Tools
The right tools are indispensable for safely removing a plant from a ceramic pot. Essential tools include pruning shears for any necessary trimming of the roots, a trowel or a dull knife to help loosen the soil around the edges of the pot without damaging it, and protective gloves to safeguard your hands during the process. Ensuring these tools are clean and in good condition beforehand can prevent introducing diseases to the plant and facilitate a smoother removal process.
C. Watering the Plant
Watering the plant 24 hours before attempting the removal is a step that can significantly ease the process. Moistening the soil helps in loosening the soil’s grip on the pot, making it easier to remove the plant without stressing the roots. It is important, however, to ensure the soil is not waterlogged, which could complicate the removal process. This preparatory step is vital for protecting the plant’s roots and making them more pliable and less likely to break during the transition.
How to Get Plant out Of Ceramic Pot: Loosening the Soil
Loosening the soil within the ceramic pot is a critical step in safely removing a plant. This phase ensures that the plant’s roots are not unduly stressed or damaged during extraction. Here’s a closer look at how to effectively loosen the soil:
A. Tapping the Pot
A gentle but firm tapping on the sides and bottom of the ceramic pot can significantly help loosen the soil. This can be done using the palm of your hand or a small rubber mallet, if available. The vibration caused by tapping helps to break up compacted soil, making it easier to remove the plant. It’s essential to perform this action carefully to avoid damaging the pot, especially if it is made of a delicate material.
B. Using a Trowel
Carefully inserting a trowel or a dull knife around the interior edge of the pot is an effective way to further loosen the soil and roots from the pot’s sides. Slide the trowel between the soil and the pot’s edge, gently moving it around the perimeter. This action helps in detaching the soil and root system that might be clinging to the sides of the pot. It’s important to use a smooth, steady motion to prevent any damage to the pot or plant.
C. Applying Pressure
Applying gentle pressure to the sides of the ceramic pot can aid in loosening the soil further. This can be achieved by gently squeezing the pot if it’s flexible or by applying uniform pressure around the pot’s circumference with your hands. A slight rocking motion can help dislodge the soil and root ball for more rigid pots. This method should be used judiciously to prevent cracking or breaking the pot, especially if it is of a brittle material like terracotta.
Each of these methods plays a pivotal role in loosening the soil, facilitating the safe removal of the plant from its ceramic home. The primary goal is to preserve the integrity of both the plant’s root system and the pot, ensuring a smooth transition to a new container.

How to Get Plant out Of Ceramic Pot: Removing the Plant
After preparing the workspace, gathering tools, watering the plant, and loosening the soil, the next critical phase is removing the plant from the ceramic pot. This stage needs to be handled with care to ensure the plant’s safety and the pot’s integrity. Here’s how to proceed:
A. Tilting the Pot
Tilting the ceramic pot gently while supporting the base can help ease the plant. The angle at which you tilt the pot will depend on factors such as its size and shape and how much space is available around it. This method allows gravity to assist in dislodging any remaining soil from the sides, making it easier to remove the plant.
B. Tapping and Shaking
Tapping or gently shaking the pot can help dislodge any stubborn soil that may still be clinging to the edges or bottom of the pot. This method is particularly useful for plants with a tightly packed root system. It’s important to proceed cautiously to avoid damaging the roots or causing them unnecessary stress.
C. Using a Trowel or Hands
Larger or more intricate plants may require the use of a trowel, hands, or both to gently scoop out the plant and its root system from the pot. Gently run the trowel around the edges of the pot, loosening any remaining soil attachments. Alternatively, using your hands to carefully loosen and separate any remaining soil from the plant’s roots can also be effective. It’s crucial to proceed slowly and carefully to avoid damaging the plant.
Once the plant has been successfully removed from the ceramic pot, it must be replanted in a new container immediately. This will minimize any stress on the plant’s root system and help it adjust quickly to its new home. With proper preparation and careful execution, safely removing a plant from a ceramic pot can be a straightforward and successful process.
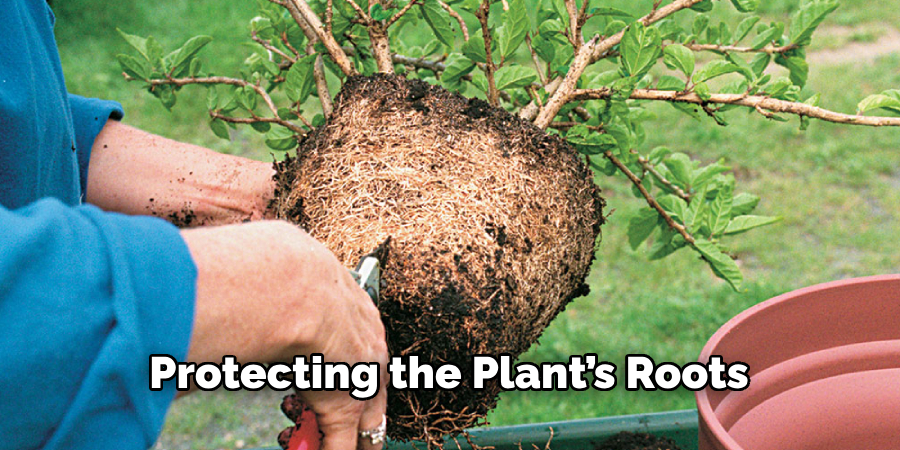
Separating the Roots
After successfully removing the plant from its ceramic pot, the next crucial step involves separating the roots carefully to ensure the plant’s continued health and vitality. This stage is delicate and requires a keen eye and a gentle touch to prevent any unnecessary stress or damage to the plant. Here’s how to effectively carry out this process:
A. Inspecting the Roots
Start by carefully inspecting the root ball for any signs of encircling, girdling, or compacted roots. These conditions occur when the roots grow densely packed together or begin to wrap around themselves, often due to being confined within a pot for too long. Such roots can strangle the plant, impeding its growth by restricting water and nutrient uptake. Identify these areas carefully, as they must be addressed to encourage a healthy root system.
B. Gently Teasing Roots
Gently tease the roots apart using your fingers or a suitable garden tool, such as a root hook or fork. This process should be approached with patience and care, slowly untangling the roots to minimize damage. The goal here is to loosen the soil and roots enough to spread out in their new environment, allowing for better water and nutrient absorption. This step is especially important for plants that have become root-bound in their previous container.
C. Trimming Overgrown Roots
In cases where the roots are severely overgrown or continue to circle even after being teased apart, some trimming may be necessary. Use a pair of clean, sharp pruning shears to carefully cut away any overgrown or circling roots. Make clean cuts to avoid fraying the roots, which could lead to disease.
Remove only the necessary amount of root material when trimming to promote healthier growth. This action encourages the development of new root branches, aiding in the plant’s acclimation to its new pot.
Separating the roots in this manner is a critical step in repotting. It not only helps to alleviate stress on the plant caused by constrained root growth but also facilitates a smoother adaptation to its new environment, ensuring the plant remains healthy and vibrant for years to come.
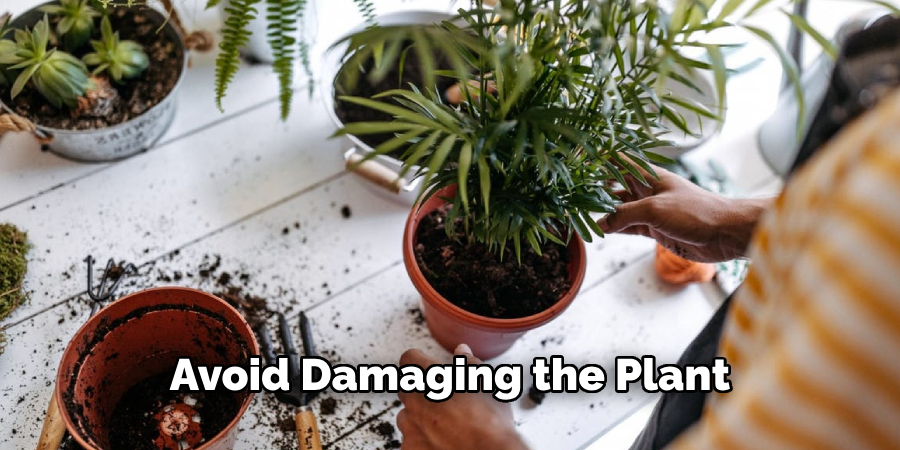
Repotting the Plant
Once the plant has been carefully removed and the roots separated, it is time to take the next pivotal step in repotting: introducing the plant to its new home. This phase involves a series of careful preparations to ensure the plant survives and thrives in its new environment. Here are the essential steps to repot the plant successfully:
A. Choosing a New Pot
Selecting a new pot is a critical decision in the repotting process. The ideal pot should have adequate drainage holes to prevent water from accumulating at the bottom, which can lead to root rot. Additionally, it should be large enough to accommodate the plant’s root system with room to grow, typically one or two sizes larger than the old pot.
This space will allow for root expansion and encourage healthy growth. When selecting a pot, also consider the material, as certain types, like terracotta or ceramic, can offer benefits such as moisture regulation.
B. Adding Potting Mix
Before placing the plant in its new pot, add a layer of fresh potting mix at the bottom. This mix should be well-aerated, provide proper drainage, and contain nutrients for the plant’s specific needs. Consider incorporating a slow-release fertilizer into the mix to support the plant’s growth over time. Fill the pot partially with the potting mix, ensuring enough room to comfortably accommodate the root ball.
C. Placing the Plant
Gently place the plant in the center of the new pot, carefully positioning it so that the top of the root ball is at the same level it was in the previous container. This positioning is crucial to avoid burying the stem too deep, which could lead to stem rot or other health issues.
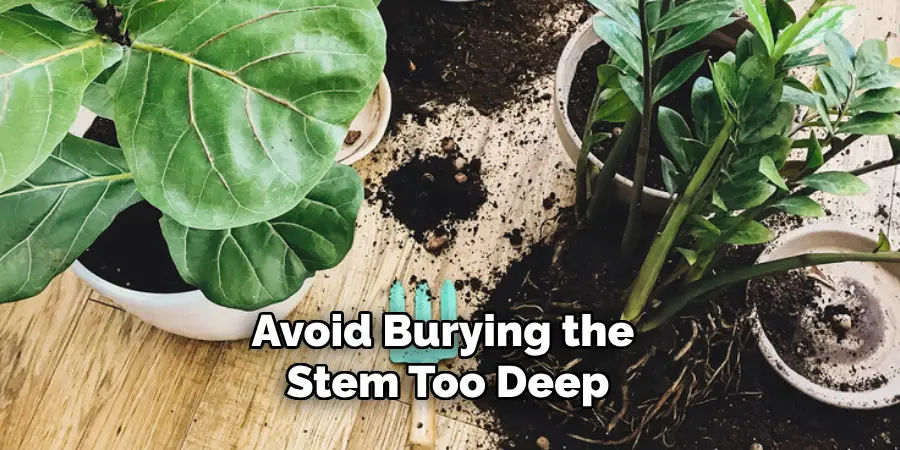
Once the plant is centered, gradually fill in around it with more potting mix, gently tamping down the soil around the roots to eliminate air pockets. However, be cautious not to compact the soil too much, as this can impede water and airflow to the roots.
After repotting, water the plant thoroughly to help settle the soil and eliminate any remaining air gaps. Ensure the water drains freely out of the bottom of the pot to confirm that the soil mixture and pot are well-suited for the plant’s drainage needs. This moment marks the beginning of a new chapter in the plant’s life, hopefully filled with vigorous growth and vitality.
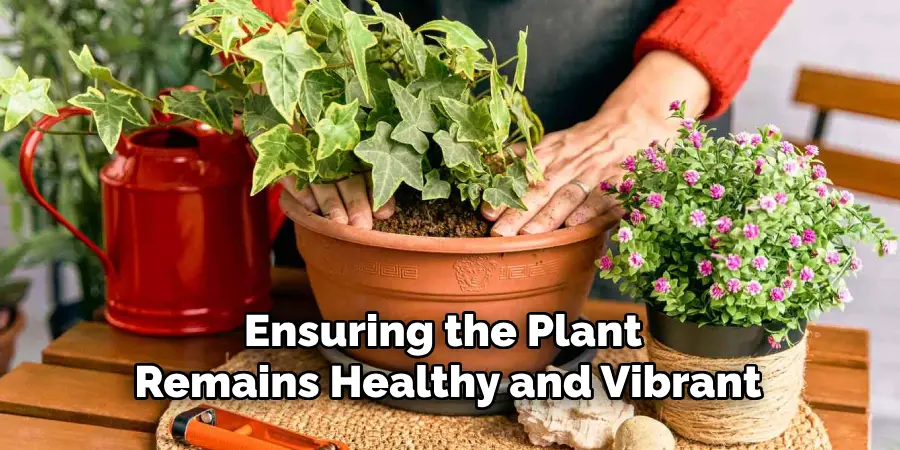
Watering and Care
After repotting, a proper watering and care routine is crucial for the plant’s adaptation and growth in its new environment. These steps will ensure the plant recovers well from the repotting trauma and continues to thrive.
A. Watering the Plant
Immediately after repotting, water the plant thoroughly to settle the soil around the roots and hydrate them effectively. This initial watering is essential, as it helps to eliminate air pockets that may have been trapped in the soil during the repotting process. Develop a consistent watering schedule, keeping the soil moist but not waterlogged.
The watering frequency will depend on the plant type, the pot’s material, and the environmental conditions. Overwatering can be just as harmful as underwatering, leading to root rot and other health issues, so monitoring the soil’s moisture level before watering is recommended.
B. Providing Adequate Light
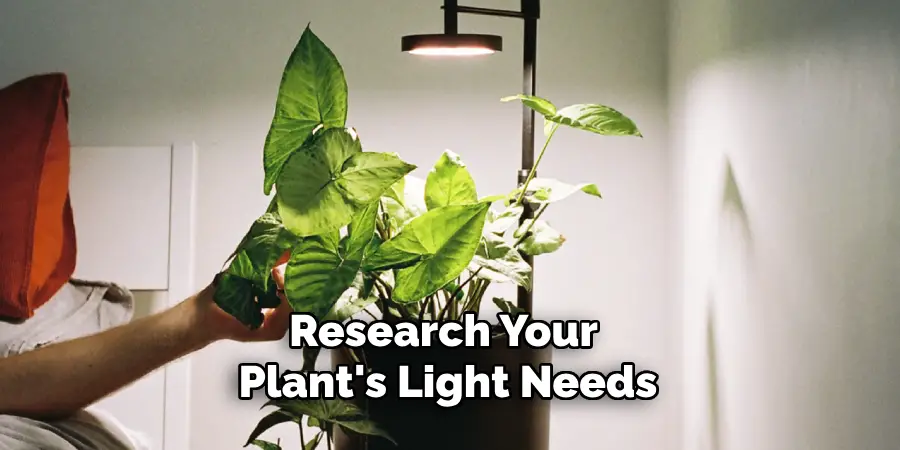
Finding the right spot for your repotted plant is pivotal in its care routine. The new location should offer adequate sunlight or shade according to the specific needs of the plant species. While some plants thrive in bright, direct sunlight, others may require indirect light to prevent leaf scorch.
Research your plant’s light needs and observe how it responds to its new location, adjusting as necessary to ensure it receives the optimal light level for healthy growth and development.
C. Monitoring for Signs of Stress
Post-repotting, it’s important to watch your plant for any signs of stress, which could manifest as wilting, yellowing, or dropping leaves. These symptoms might indicate adjustment issues, such as inadequate water, light, or possible shock from the repotting process.
If you notice such signs, reassess your care routine and consider whether watering, lighting, or even indoor temperature adjustments are necessary. Occasionally, providing a mild plant food formulated for stressed plants can help bolster recovery and growth.
Maintaining a balanced care regimen after repotting is key to your plant’s health. By ensuring proper watering, light conditions, and monitoring for stress, your plant will be more equipped to adapt to its new pot, leading to more robust and vibrant growth over time.
Frequently Asked Questions
Q1: How often should I repot my plants?
A1: Most plants need to be repotted every 1-2 years, but this can vary depending on the plant’s growth rate and the conditions inside its current pot. Fast-growing plants or those that become root-bound quickly may require more frequent repotting.
Q2: How Do I Know if My Plant Needs Repotting?
A2: Signs that your plant may need repotting include roots growing through the drainage holes, water standing on the surface or draining through the pot too quickly, slowed growth, and the plant becoming top-heavy or tipping over.
Q3: What Is the Best Time of Year to Repot Plants?
A3: The best time to repot most plants is during their active growth period, usually in spring or early summer. This allows the plant to recover and grow easily after repotting, taking advantage of the peak growing season.
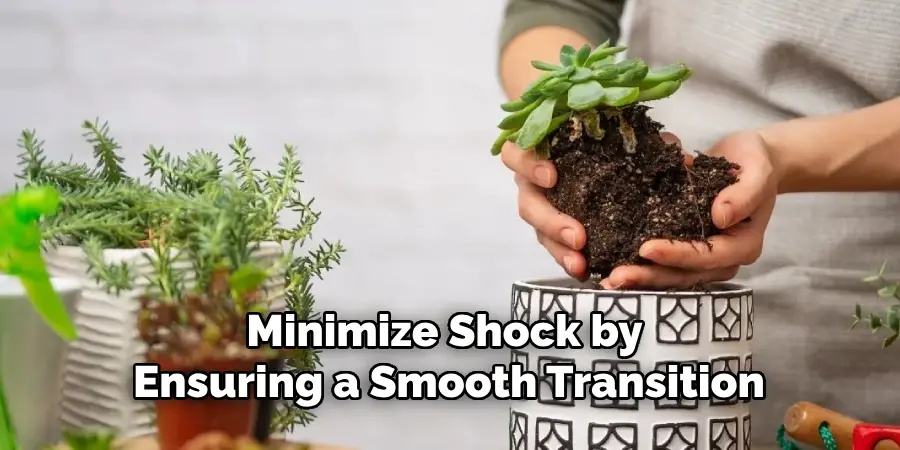
Q4: Can Repotting Cause Shock to My Plants?
A4: Yes, repotting can cause shock, which might manifest as drooping, yellowing, or leaf drop. However, you can minimize shock by ensuring a smooth transition, such as watering your plant before repotting and placing it in similar lighting conditions after repotting.
Q5: Do All Plants Require the Same Type of Soil when Repotting?
A5: No, different plants have different soil requirements. Research your specific plant’s needs—some may require well-draining soil, while others might need soil that retains more moisture. Adjusting the potting mix accordingly can promote healthier growth.
Q6: How Much Bigger Should the New Pot Be than The Old One?
A6: Generally, the new pot should be about 1-2 inches larger in diameter than the old pot for small to medium plants and 2-4 inches larger for larger plants. This extra space allows for growth without giving too much space, which can lead to waterlogging issues.
Q7: Can I Reuse Old Pots for Repotting?
A7: Yes, old pots can be reused for repotting, but they should be thoroughly cleaned and disinfected before use to prevent the spread of disease from previous plants.
Conclusion
In conclusion, the process of how to get plant out of ceramic pot and successfully repot it into a new home requires careful attention, preparation, and execution. From the initial removal with keen attention to preserving the plant’s roots, selecting an ideal pot, to the appropriate addition of potting mix, and the meticulous placement within the new container—each step plays a pivotal role in ensuring the transition is stress-free for the plant.
The importance of post-repotting care, including proper watering, adequate light, and monitoring for signs of stress, cannot be overstated. It ensures that the plant survives its new environment and thrives, displaying vigorous growth and vitality. Successfully completing the repotting process offers immense satisfaction, knowing you’ve provided your plant with a fresh start and the opportunity for continued health and beauty.
About the Author
Adrien Rowe, an expert in knitting, fiber arts, and bookbinding, promotes sustainability and creativity through workshops and tutorials. Passionate about education and community, he inspires crafters of all levels to learn, share, and grow in a supportive, idea-driven environment.
Professional Focus
Specializes in advanced knitting techniques, fiber manipulation, and textile innovation.
Expert in book arts, including cotton papermaking, handmade paper techniques, and bookbinding.
Dedicated to educating and inspiring crafters of all skill levels through tutorials, workshops, and hands-on learning experiences.
Passionate about creating a supportive community where makers can share ideas, learn, and grow.
Education History
Rhode Island School of Design (RISD) – Bachelor of Fine Arts (BFA) in Textiles.
University of Iowa Center for the Book – Master of Fine Arts (MFA) in Book Arts.
Expertise:
Advanced knitting, fiber manipulation, papermaking, bookbinding, sustainability-focused crafting, educational workshops, creative tutorials, and fostering a supportive maker community.