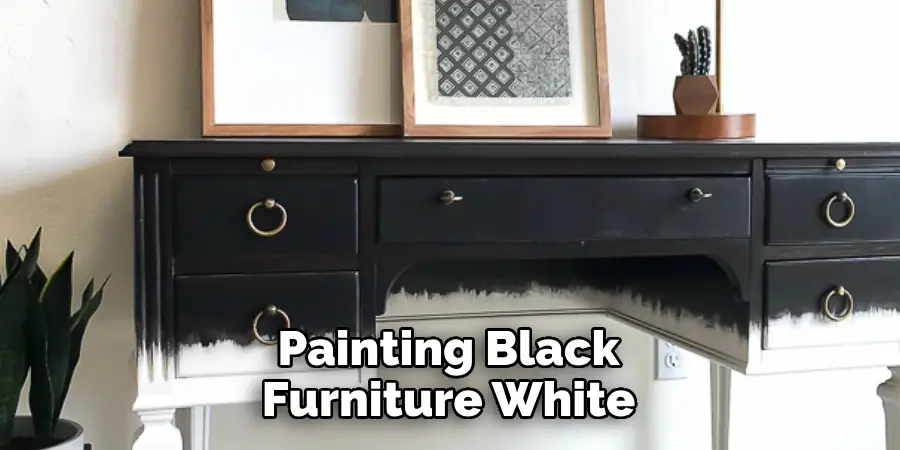
Adding a fresh coat of paint to old furniture is an easy and affordable way to give it new life. Painting black furniture white can completely transform the look and feel of a room. Follow these steps on how to paint black furniture white to achieve a flawless finish on your black furniture.

Gather Your Supplies
Before you begin, make sure you have all the necessary supplies:
- Sandpaper (medium grit)
- Primer
- White paint (latex or chalk-based)
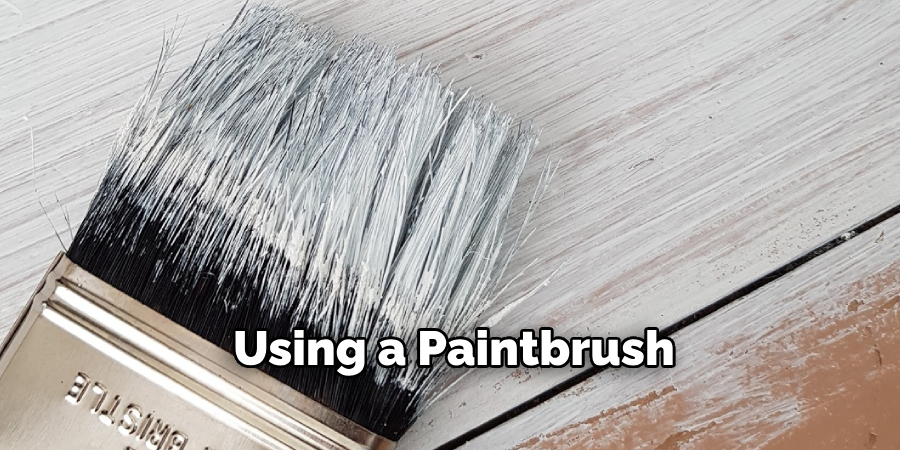
- Paintbrushes and/or rollers
- Painter’s tape
- Drop cloth or plastic sheeting to protect your work area
12 Steps on How to Paint Black Furniture White
Step 1: Prepare the Furniture
Start by removing any hardware from the furniture, such as knobs or handles. Next, use a medium grit sandpaper to lightly sand the surface of the furniture. This will help remove any sheen and rough up the surface for better paint adhesion.
Step 2: Clean the Furniture
After sanding, wipe down the furniture with a damp cloth to remove any dust or debris. This will ensure a smooth surface for painting. Soapy water can also be used to clean any stubborn dirt or grime.
Step 3: Protect the Surrounding Area
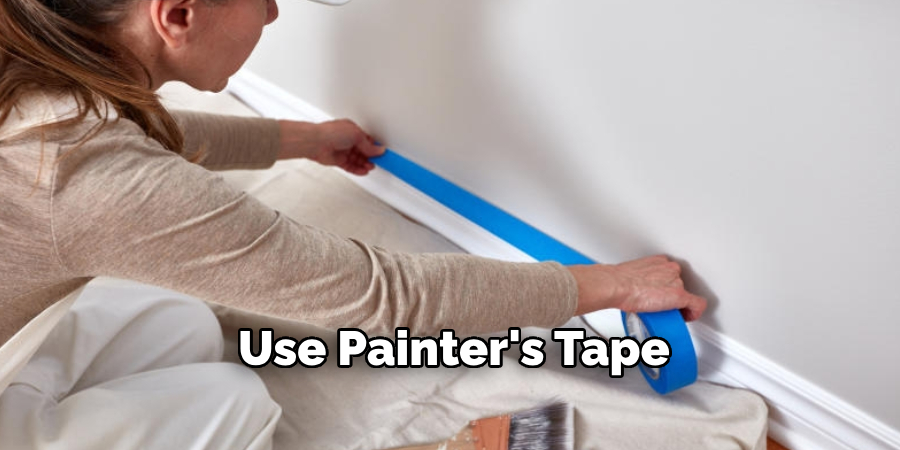
Cover your work area with a drop cloth or plastic sheeting to protect it from paint spills and splatters. Use painter’s tape to cover any areas you don’t want painted, such as hardware or edges. While painting, make sure to work in a well-ventilated area.
Step 4: Apply Primer
Using a primer will help the white paint adhere better and prevent any bleed-through from the black paint. Use a paintbrush or roller to apply an even coat of primer over the entire surface of the furniture. Let it dry completely before moving on to the next step.
Step 5: Sand Again (Optional)
If the surface is not smooth after applying the primer, you can lightly sand it again to remove any roughness or brush marks. Wipe away any dust before moving on. Even if the surface feels smooth, it’s still a good idea to lightly sand before painting for maximum adhesion.
Step 6: Stir and Strain the Paint
Before opening your can of white paint, make sure to stir it thoroughly with a paint stirrer. This will help even out the color and consistency. If you are using old or lumpy paint, strain it through a mesh strainer to remove any impurities.
Step 7: Begin Painting
Using a paintbrush or roller, apply your white paint in thin, even coats. It’s better to do multiple thin coats than one thick coat, as this will result in a smoother finish. Make sure to cover the entire surface and watch out for drips or runs.
Step 8: Let it Dry
Check the instructions on your paint can for drying times, but as a general rule, allow each coat of paint to dry completely before applying another. This will prevent any tackiness or unevenness in the finish.
Step 9: Sand Between Coats (Optional)
If you want an extra smooth finish, you can lightly sand between coats of paint using a fine grit sandpaper. This will help remove any brushstrokes or imperfections. Make sure to wipe away any dust before applying the next coat.
Step 10: Apply Multiple Coats
Continue painting and letting each coat dry until you achieve the desired coverage and finish. You will likely need at least 2-3 coats for full coverage, but this can vary depending on the type of paint and surface you are working with.
Step 11: Touch up any Imperfections
Once your final coat is dry, inspect the furniture for any missed spots or imperfections. Use a small brush to touch up these areas with extra paint if needed. Very minor imperfections can also be fixed with sanding and another coat of paint.
Step 12: Finish with a Protective Coat (Optional)
To protect your newly painted furniture, you can apply a clear topcoat such as polyurethane or wax. This will help prevent scratches and stains on the surface. Follow the instructions on the product for best results.
Painting black furniture white may seem like a daunting task, but with the right supplies and techniques, it can easily be done at home. Follow these steps to achieve a flawless finish and give your old furniture a fresh new look that will brighten up any room. Remember to take your time and be patient for the best results.
9 Safety Measures to Follow When Painting Furniture
While painting furniture can be a fun and rewarding DIY project, it’s important to take proper safety precautions to protect yourself and your surroundings. Here are 9 safety measures to follow when Painting Furniture:
1) Wear Protective Gear
When painting, make sure to wear protective gear such as gloves, goggles, and a mask. This will protect your skin, eyes, and lungs from any potential hazards. As a bonus, it will also prevent paint splatters on your clothes.
2) Work in a Well-Ventilated Area
Paints and primers can emit strong fumes that can be harmful if inhaled for an extended period of time. Make sure to work in a well-ventilated area with open windows or use a fan to circulate the air. Then, take breaks to go outside and get some fresh air.
3) Keep Children and Pets Away
To prevent accidents, make sure to keep children and pets away from your work area while painting. Chemicals in paints can be toxic if ingested or inhaled, so it’s best to keep them out of reach. But if they must be in the same room, make sure to properly ventilate the area.
4) Use a Drop Cloth or Plastic Sheeting
To protect your floors and surrounding surfaces from paint spills, make sure to use a drop cloth or plastic sheeting. This will also save you time and effort from having to clean up any accidental spills. So always make sure to cover your work area before starting.

5) Avoid Painting on Windy Days
Painting outdoors or in a garage can be tempting, especially if you have limited space. However, avoid painting on windy days, as the wind can carry paint fumes and dust particles onto nearby surfaces or into your lungs. This can result in an uneven finish and potential health hazards.
6) Read and Follow Product Instructions
Different paints and primers may have different instructions and safety precautions, so make sure to read and follow them carefully. This will ensure the best results and minimize any potential hazards. Even if you have experience with painting, every product is different and may require a specific technique or safety measure.
7) Dispose of Materials Properly
Once you have finished your project, make sure to properly dispose of any used materials, such as paint cans, brushes, or rags. Follow local regulations for disposing of hazardous materials. Do not dump leftover paints down the drain or in the trash, as they can be harmful to the environment.
8) Clean Up Thoroughly
After painting, it’s important to clean up your work area thoroughly. Dispose of any used materials and properly store leftover paints and supplies. Make sure to clean your brushes and other tools properly before storing them.

9) Take Breaks and Stay Hydrated
Painting furniture can be a time-consuming task, so make sure to take breaks and stay hydrated. This will help prevent fatigue and dehydration, which can lead to accidents or health issues. Remember to listen to your body and take breaks when needed.
Following these safety measures on how to paint black furniture white will not only protect you from potential hazards but also ensure the best results for your painted furniture project. Remember, safety first for a successful and enjoyable DIY project! So, always make sure to follow these measures before embarking on any painting project.
8 Things to Avoid when Painting Furniture
While there are many tips and techniques for successfully painting furniture, there are also some things you should avoid to prevent any issues or mistakes. Here are 8 things to avoid when painting furniture:
1) Skipping the Prep Work
It may be tempting to skip the prep work and jump straight into painting, but this will likely result in a poor finish. Always make sure to clean and sand the surface properly before painting to ensure the best adhesion and smooth finish.
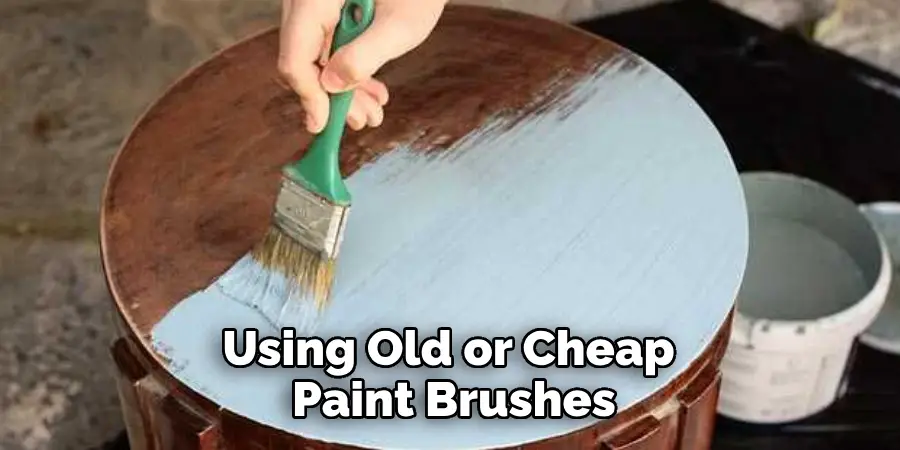
2) Using Cheap or Old Paint Brushes
Using old or cheap paint brushes can result in a streaky and uneven finish. Invest in good quality brushes for a smoother application and better coverage. Make sure to clean your brushes properly after each use to prolong their lifespan.
3) Not Patching Holes or Imperfections
If your furniture has any holes, scratches, or imperfections, make sure to patch them before painting. Otherwise, these flaws will still be visible after painting and can ruin the overall look of your piece. As the saying goes, “Prevention is better than cure.”
4) Painting in Direct Sunlight
Painting in direct sunlight can cause the paint to dry too quickly and result in a streaky and uneven finish. Make sure to choose a shaded area or wait for a cloudy day to paint your furniture. Therefore, natural light is key to achieving a smooth and flawless finish.
5) Overloading Your Paintbrush
Overloading your paintbrush with too much paint can result in drips and runs on your furniture. Make sure to remove any excess paint before applying it to the surface. This will also help prevent a buildup of paint on the edges or corners, resulting in a cleaner and neater finish.
6) Using the Wrong Type of Paint
Using the wrong type of paint for your furniture can also lead to poor results. For example, water-based paint can be used on a piece that is exposed to moisture or may not hold up well in the outdoor elements. Make sure to choose a suitable paint for your project.
7) Rushing the Drying Process
It’s important to allow enough time for each coat of paint to fully dry before applying the next. Rushing the drying process can result in an uneven finish and may cause issues when sanding or distressing later on. Patience is key when it comes to painting furniture.
8) Not Testing a Sample First
If you’re trying out a new paint or technique, always make sure to test it on a small sample piece first. This will give you an idea of how the paint will look and adhere to your furniture before committing to painting the entire piece.
It’s better to discover any issues on a small scale rather than having to redo your entire project. In conclusion, by avoiding these mistakes and following safety measures, you can ensure a successful and enjoyable furniture painting project.
Happy painting! So always remember to avoid these mistakes on how to paint black furniture white and take the necessary precautions for a successful and safe furniture painting experience. Now, go out there and transform your old furniture into beautiful new pieces with confidence!
8 Additional Tips for Painting Furniture
In addition to avoiding common mistakes and practicing safety measures, here are 8 additional tips to keep in mind when painting furniture:
1) Use a Primer
Using a primer before painting can help the paint adhere better, resulting in a smoother and more durable finish. It can also help cover up any stains or imperfections on the surface. So don’t skip this important step in the painting process.
2) Choose the Right Paint Finish
The finish of your paint can greatly affect the final look of your furniture. Matte finishes are great for a more rustic or shabby chic style, while glossy finishes can give a modern and sleek look. Choose a finish that best suits your desired outcome.
3) Consider Distressing
If you want to achieve a distressed or vintage look, consider distressing your furniture before or after painting. This can be done with sandpaper or a wet cloth and can add character and charm to your piece.
4) Protect Your Painted Furniture
To ensure the longevity of your painted furniture, it’s important to protect it with a sealant. This can be a clear coat, wax, or polyurethane depending on the type of paint used. Make sure to follow the instructions for proper application.
5) Add Decorative Touches
Painting furniture doesn’t have to stop at just one color. Consider adding decorative touches such as stencils, patterns, or even hand-painted designs to make your piece unique and personal.
6) Use Quality Materials
In addition to using good quality paint brushes, make sure to also use high-quality paint and other materials for the best results. This may cost more upfront, but it will save you time and effort in the long run.
7) Don’t be Afraid to Experiment
Painting furniture allows for creativity and experimentation. Don’t be afraid to try out different colors, techniques, or styles to find what works best for you and your furniture. Even if something doesn’t turn out as expected, it can always be repainted or fixed.
8) Have Fun!
Last but not least, have fun with your furniture painting project! It’s a great way to express your creativity and transform old pieces into new and unique ones. Enjoy the process, and don’t stress too much about achieving perfection because imperfections can add character and make your piece one-of-a-kind.
With these tips on how to paint black furniture white in mind, you are now ready to take on your next furniture painting project with confidence and success! Happy painting! So go ahead and let your imagination run wild as you transform your old furniture into beautiful, updated pieces that reflect your personal style. And most importantly, have fun throughout the process!
Frequently Asked Questions
Can I Paint Over Previously Painted Furniture?
Yes, as long as the previous paint is in good condition and properly prepped before painting. If the previous paint is chipping or peeling, it’s best to remove it completely before applying a new coat.
What Type of Paint Should I Use for Furniture?
There are many different types of paint that can be used for furniture, such as latex, oil-based, chalk, and milk. It’s important to choose a type that is suitable for the surface you are painting and the desired finish.
Do I Need to Seal Painted Furniture?
It’s highly recommended to seal painted furniture with a clear coat, wax, or polyurethane for protection and durability. Make sure to use a sealant suitable for the type of paint used.
How Can I Add Colorful Designs to My Painted Furniture?
You can use stencils, tape, or even freehand brush techniques to add colorful designs to your painted furniture. Don’t be afraid to get creative and try out different methods!
Can I Paint Outdoor Furniture?
Yes, there are specific paints and sealants designed for outdoor use that can be used on furniture. For the best results, choose a durable and weather-resistant option. Good luck with your furniture painting project, and have fun transforming your old pieces into beautiful new ones!
Conclusion
In conclusion, painting furniture can be a fun and rewarding DIY project. By avoiding common mistakes, practicing safety measures, and following these helpful tips on how to paint black furniture white, you can achieve a successful and beautiful finish on your furniture. Remember to take your time, test out new techniques on small samples first, and have fun throughout the process.
Happy painting! So go forth confidently with your paintbrush and let your creativity shine as you give new life to old furniture. And don’t forget to share your impressive before-and-after photos with friends and family! With these tips in mind, you are now ready to take on any furniture painting project with confidence and success.
About the Author
Adrien Rowe, an expert in knitting, fiber arts, and bookbinding, promotes sustainability and creativity through workshops and tutorials. Passionate about education and community, he inspires crafters of all levels to learn, share, and grow in a supportive, idea-driven environment.
Professional Focus
Specializes in advanced knitting techniques, fiber manipulation, and textile innovation.
Expert in book arts, including cotton papermaking, handmade paper techniques, and bookbinding.
Dedicated to educating and inspiring crafters of all skill levels through tutorials, workshops, and hands-on learning experiences.
Passionate about creating a supportive community where makers can share ideas, learn, and grow.
Education History
Rhode Island School of Design (RISD) – Bachelor of Fine Arts (BFA) in Textiles.
University of Iowa Center for the Book – Master of Fine Arts (MFA) in Book Arts.
Expertise:
Advanced knitting, fiber manipulation, papermaking, bookbinding, sustainability-focused crafting, educational workshops, creative tutorials, and fostering a supportive maker community.