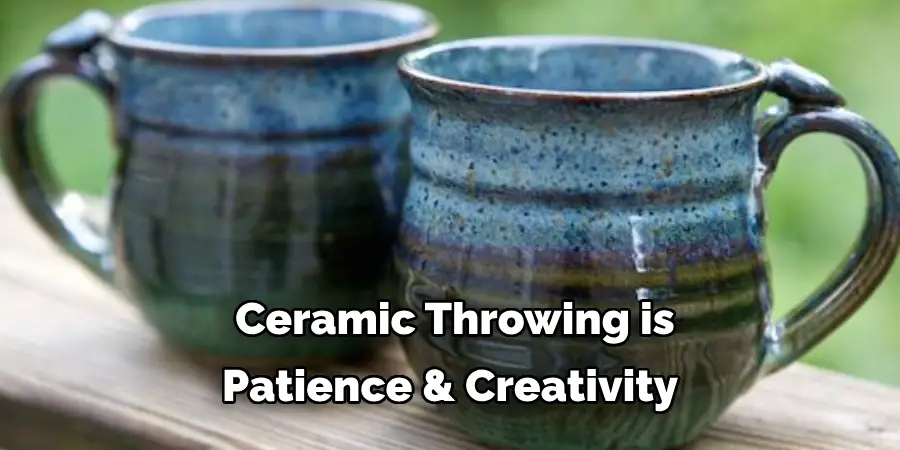
Ceramic throwing, an ancient form of artistry, involves skillfully shaping clay on a potter’s wheel to create various objects, from simple cups to intricate vases. This introductory guide aims to unravel the secrets behind mastering ceramic throwing techniques, a fundamental skill for any aspiring ceramicist. In the realm of ceramic art, throwing techniques are not just methods but are pivotal in defining the artist’s capability to manipulate clay into desired forms. Knowing how to throw ceramics effectively lays the groundwork for innovation and creativity in this tactile art form.
We will explore the comprehensive process, from preparing the clay to the final touches that make each piece unique, alongside the essential skills needed to thrive in ceramic throwing. Embark on this creative journey with us as we guide you through the mesmerizing world of ceramics, where every spin of the wheel brings your vision one step closer to reality.
Preparing Clay and Equipment
A. Selecting Clay:
Choosing the right clay is the first step in the ceramic throwing process. The type of clay you select impacts the throwing experience and the final outcome of your ceramic piece. Consider factors such as texture, color, and firing temperature when selecting your clay.
Porcelain and stoneware are popular choices for throwing due to their plasticity and strength. Porcelain, known for its smooth texture and pure white color, is ideal for delicate work that requires fine detail. In contrast, stoneware, available in various colors and textures, is well-suited for more substantial pieces. The firing temperature of your clay must also align with your kiln’s capabilities and the desired finish of your piece.
B. Wedging Clay:
Wedging clay is akin to kneading dough; this critical step ensures that the clay is homogeneous in texture and free from air pockets, which could lead to cracks or explosions in the kiln. The process involves cutting and folding the clay, then throwing it down onto a surface to compress it. This technique also aligns the clay particles similarly, significantly enhancing the throwing process. There are several wedging techniques, such as the Rams Head or Spiral method, each with its merits, but consistency in practice is key to effective wedging.

C. Setting Up Equipment:
The pottery wheel is the ceramicist’s canvas, and setting it up correctly is crucial for successful throwing. Your workplace should be comfortable, with the wheel at a height that allows your legs to fit snugly under and your body to maintain an upright posture. Alongside the wheel, tools such as ribs, wire cutters, sponges, needles, and trimming tools should be within easy reach. A water basin is also essential for keeping the clay workable and cleaning your hands and tools during the throwing process. Preparation and organization of your clay and equipment will streamline your workflow and enhance your overall throwing experience.
How to Throw Ceramics: Centering and Opening
Centering and opening the clay are foundational steps in the art of ceramic throwing, crucial for creating symmetrical and balanced pieces. Mastering these early stages sets the tone for the entire throwing process, influencing the final shape and form of the ceramic object.
A. Centering Clay:
Centering clay on the wheel head is perhaps the most challenging yet important step for beginners to master. It involves positioning the clay mass in the middle of the wheel head and using both hands to apply pressure and create a uniform motion that eliminates wobbles.
The left hand (for right-handed individuals) is typically used to apply pressure on the side, while the right hand applies pressure from above. This synchronized pressure gradually brings the clay into a centered mound, ready for opening. Achieving a perfectly centered piece of clay requires patience, practice, and a steady hand, as any off-center clay will lead to asymmetrical forms during the throwing process.
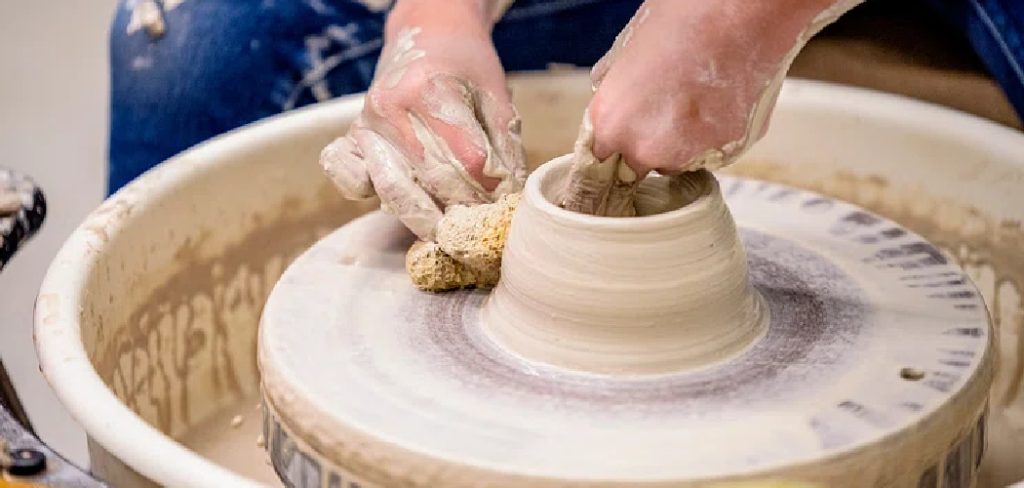
B. Opening the Clay:
Once the clay is centered, the next step is to open the clay mass to form a cavity. This is done by pressing the thumbs or fingers down into the center of the clay while the wheel spins to create the initial opening. Care must be taken to maintain even pressure and avoid pressing too far, which could compromise the strength and stability of the base. The aim is to create a smooth, even opening that will dictate the inner width of the vessel or object being thrown.
C. Establishing Base Thickness:
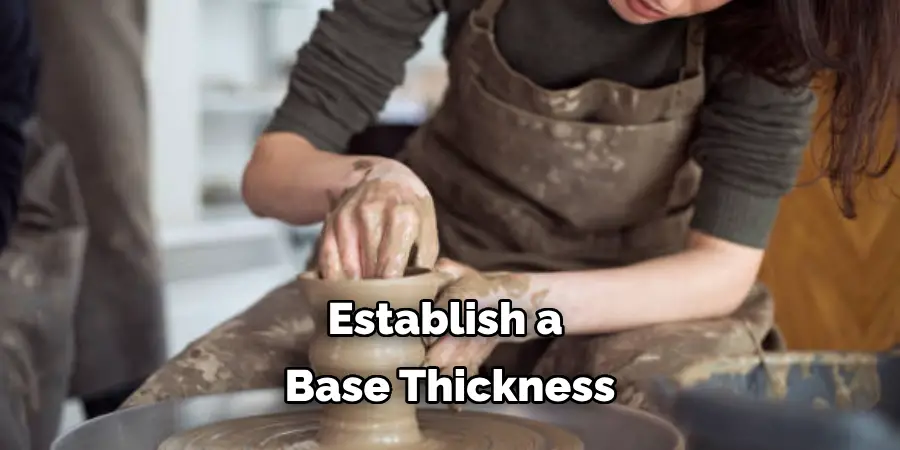
Establishing a uniform thickness at the base of the thrown form is essential for the final piece’s aesthetics and functionality. After opening the clay, the fingers are used to gauge and refine the thickness of the base. This is achieved by gently pressing down on the base and pulling the clay outwards. Maintaining steady hands and an even pressure ensures the base is not too thin, which could lead to cracks or weak points, nor too thick, which might affect the form and weight of the final piece. Careful attention to the base at this stage lays a solid foundation for the subsequent steps of pulling and shaping the walls of the ceramic object.
How to Throw Ceramics: Pulling and Shaping
The stages of pulling and shaping are where the ceramic piece begins to take its definitive form. This process requires a harmonious blend of skill, patience, and intuition as the artist transforms the basic cylinder into a nuanced, functional, or decorative object.
A. Pulling Walls:
Pulling the walls of the clay is a methodical process that gradually elongates and thins the mass into a vessel’s walls. Starting at the base, the ceramicist’s fingers pinch the clay, moving upward and slightly outward with a controlled, steady motion as the wheel turns. It’s essential to apply uniform pressure during this process to ensure that the walls have even thickness throughout.
The wheel’s speed, the clay’s moisture, and the pressure applied all influence the success of this stage. Pulling too fast or with uneven pressure can cause the walls to warp or collapse, so a delicate touch and disciplined technique are crucial. Water or slip is often applied to keep the clay workable and to reduce friction between the hands and the clay, facilitating smoother pulls.
B. Shaping the Form:
Once the walls reach the desired height and thickness, the focus shifts to shaping the form. In this stage, the artist’s vision begins to materialize, with hands, fingers, and various shaping tools used to mold the clay. Whether creating a bowl’s gentle curve, a vase’s tapered neck, or a mug’s rounded belly, each action is deliberate.

The outer contour is shaped by gently pressing and guiding the clay, both from the inside and outside, into the envisaged form. Tools like wooden and metal ribs are employed to refine the shape and remove excess clay and smooth surfaces. The rim of the piece often receives special attention to ensure it is even and functional, customized with a bevel or a smooth, rounded finish based on the final use of the ceramic object.
C. Refining Details:
The final step in the throwing process involves refining details to enhance the piece’s aesthetics and functionality. Smoothing the surface, compressing the clay to remove any sponginess, and carefully adjusting the form for symmetry are vital tasks.
At this stage, additional elements like handles, spouts, or decorative appliqués are often attached or carved into the piece. The artist may also inscribe or stamp patterns to add texture and visual interest. This stage requires thoughtful consideration of the piece’s ultimate purpose, as the final touches can significantly influence the ceramic object’s utility and beauty.
Achieving the desired aesthetics and functionality in ceramic throwing is a testament to the ceramicist’s skill and artistic vision, honed through experimentation and experience.
Trimming and Finishing
The trimming and finishing phases are critical in ceramic art, providing the piece with a polished appearance and stable foundation. Despite less visibility in the final product, these steps greatly influence both the aesthetic appeal and functionality of the ceramic work.
A. Trimming Foot and Base:
Trimming involves removing excess clay from the bottom of the piece to create a foot ring and ensure a level base. This step is performed when the clay is leather-hard, using various trimming tools such as loop tools, ribs, and needles. The ceramicist centers the piece upside down on the wheel and secures it with clay wads or a chuck.
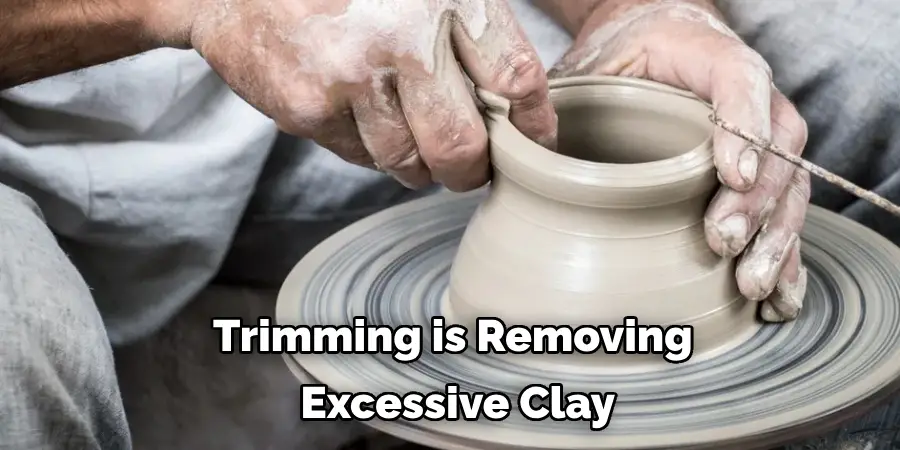
Carefully spinning the wheel, the artist trims away uneven sections and excess clay to form a foot that complements the object’s design. This adds a professional finish and enhances the piece’s stability and functionality. The foot ring, a subtle yet vital feature, elevates the piece slightly off the table, preventing scratches and facilitating more efficient glaze firing by reducing the surface area in contact with kiln shelves.
B. Adding Texture and Surface Design:
After trimming, artists often add texture or surface designs to elevate the visual appeal of their work. Techniques vary widely, from simple tools like stamps and roulettes to more intricate carving and graffito, where layers are scratched away to reveal contrasting colors beneath. This stage is where the artist’s creativity truly shines, allowing for personalized touches that make each piece unique. Textures can influence the tactile experience of a ceramic object, adding depth and movement to its surface. Decorative elements may also carry symbolic meanings or contribute to the piece’s narrative.
C. Refining Surface:
The final step before bisque firing involves cleaning and smoothing the ceramic surface and edges. Sponge, rubber ribs, and soft cloths are used to wipe away any remaining debris and smooth out imperfections. This process is crucial for ensuring a polished, ready-to-glaze surface. Sharp edges are often rounded to prevent glaze from running off during firing, and any remaining slip or fingerprints are meticulously removed. Attention to detail during the refining process can significantly impact the overall quality and aesthetic of the finished piece, demonstrating the artist’s dedication to their craft.
Trimming and finishing are as much a part of the ceramic artist’s expressive repertoire as the initial shaping and forming stages, with each carefully executed trim, texture, and refinement adding to each piece’s story.
Drying and Firing
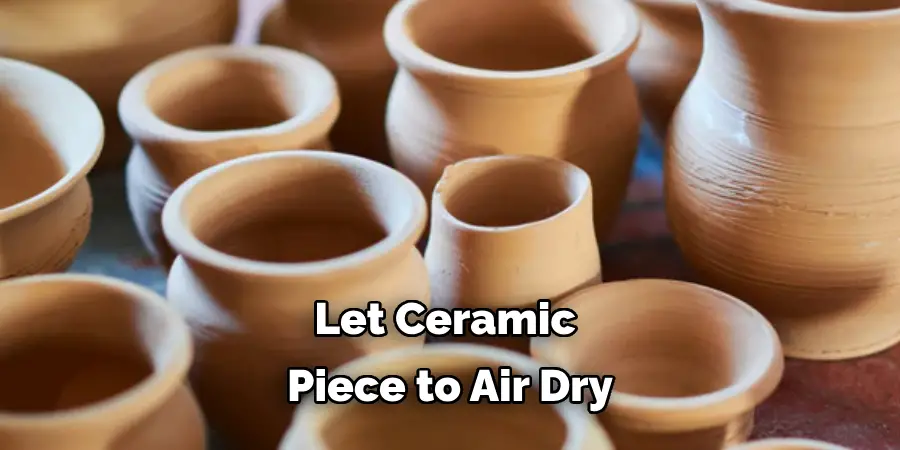
A. Allowing for Drying Time:
After the meticulous throwing, trimming, and refining processes, allowing the thrown ceramic piece to air dry is a crucial next step. The piece must dry slowly and evenly to prevent any unwanted cracking or warping. This drying stage, often overlooked in its importance, is where patience becomes vital. The ceramicist must ensure the piece is kept in an environment where humidity and temperature are controlled to facilitate gradual drying. Covering the piece with plastic can help slow the drying process, avoiding the stresses that rapid drying can induce in the clay body. It is ready for the kiln when the piece has reached a bone-dry state, visibly lighter in color and significantly harder.
B. Bisque Firing Process:
Once thoroughly dried, the piece undergoes bisque firing, a preliminary firing process that hardens the clay and stabilizes its form. This firing is conducted at a relatively low temperature, typically between 1730°F to 1940°F (945°C to 1060°C), transforming the clay into a porous, yet more durable, state. Bisque firing serves multiple purposes; it further eliminates any residual moisture within the clay body, making it less fragile and more suitable for glazing. The chemical changes during this stage ensure that the glaze will adequately adhere to the surface of the ceramic piece.
C. Glazing and Final Firing:
After bisque firing, the ceramic piece is ready for glazing. The artist applies glaze, a liquid glass-like substance, to the bisque-fired piece, which can be done through various methods, including dipping, pouring, or brushing. The choice of glaze and application technique can significantly impact the final visual aesthetics, from glossy finishes to matte textures and vibrant colors to subtle earth tones. The glazed piece is then subjected to the final firing, known as glaze firing, at high temperatures reaching up to 2372°F (1300°C).
In this stage, the glaze melts, forming a glassy surface that encapsulates the piece, enhancing its strength and sealing it against water and stains. Achieving the desired finish relies on the precise control of temperature, atmosphere, and timing in the kiln, culminating in transforming the clay piece into a durable and artful ceramic work.
Troubleshooting and Tips
A. Addressing Common Issues:
In the realm of ceramics, common issues like warping, cracking, or uneven thickness can often discourage artists. However, understanding the root causes and implementing solutions is key to overcoming these challenges. Warping and cracking can result from uneven drying or thickness, emphasizing the importance of uniform shaping and allowing for slow, even drying. Preventing these issues begins at the throwing stage by ensuring consistent pressure and speed.

Additionally, ensuring an even moisture distribution by covering the piece with plastic can mitigate the risks. For cracked pieces, slipping and scoring the affected area before it dries completely can sometimes salvage the work. Addressing uneven thickness requires a steady hand and lots of practice to develop a feel for the clay’s movement under pressure.
B. Practice and Patience:
The development of skill in ceramic throwing is a gradual process, demanding both practice and patience. Mastery comes from not just understanding the techniques but from the consistent application and refinement of skills over time. Every mistake is a learning opportunity, guiding artists to refine their craft. Patience is crucial, especially when waiting for the clay to reach the right consistency or allowing the piece to dry adequately before firing.
C. Experimentation and Creativity:
Ceramics is a field where experimentation and creativity can lead to extraordinary results. Artists are encouraged to experiment with different forms, techniques, and glaze combinations to discover unique styles and finishes. Mixing glazes, altering firing temperatures, or incorporating unconventional materials can produce surprising and innovative outcomes. This approach not only fosters creativity but also pushes the boundaries of traditional ceramic art, leading to personal growth and the medium’s evolution.
Conclusion
In the comprehensive exploration of how to throw ceramics, we’ve traversed the delicate balance of art and science that defines this timeless craft. From the initial centering of clay on the wheel to the meticulous trimming, drying, and firing processes, each step is imbued with both technique and a touch of the artist’s essence. We’ve outlined practical tips to tackle common challenges, emphasizing that mastering ceramic throwing is a blend of patience, practice, and creative experimentation.
The artistry and craftsmanship of throwing ceramics are profound, demanding technical skill and an intimate connection with the material. Each thrown piece is a testament to the ceramist’s dedication and the unique interplay between human hands and the earth’s elements.
To those inspired to venture into the world of ceramic throwing, remember that every lump of clay holds the potential for something beautiful. Encouraged by the guidance shared, may you explore and enjoy the process of creating unique ceramic objects. The journey of learning how to throw ceramics is not just about the final product but about the growth, discovery, and joy found in every turn of the wheel.
About the Author
Adrien Rowe, an expert in knitting, fiber arts, and bookbinding, promotes sustainability and creativity through workshops and tutorials. Passionate about education and community, he inspires crafters of all levels to learn, share, and grow in a supportive, idea-driven environment.
Professional Focus
Specializes in advanced knitting techniques, fiber manipulation, and textile innovation.
Expert in book arts, including cotton papermaking, handmade paper techniques, and bookbinding.
Dedicated to educating and inspiring crafters of all skill levels through tutorials, workshops, and hands-on learning experiences.
Passionate about creating a supportive community where makers can share ideas, learn, and grow.
Education History
Rhode Island School of Design (RISD) – Bachelor of Fine Arts (BFA) in Textiles.
University of Iowa Center for the Book – Master of Fine Arts (MFA) in Book Arts.
Expertise:
Advanced knitting, fiber manipulation, papermaking, bookbinding, sustainability-focused crafting, educational workshops, creative tutorials, and fostering a supportive maker community.