Baking Sculpey Clay is a pivotal step in the creation of durable and aesthetically pleasing sculptures and jewelry. This guide is designed to demystify the process of how to bake clay sculpey, ensuring that artists and hobbyists can achieve professional-quality results from the comfort of their home studios. The importance of proper baking cannot be overstated, as it directly impacts the clay pieces’ finish, strength, and longevity.
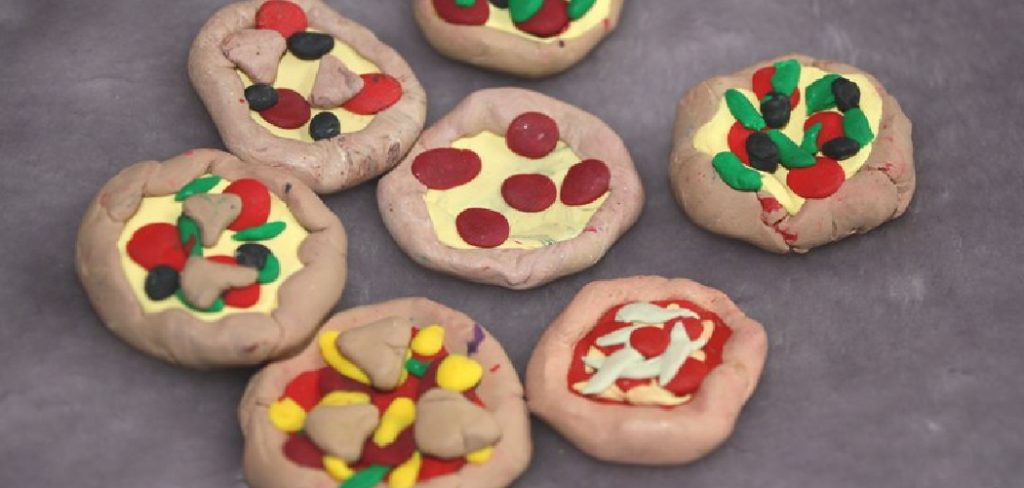
Understanding the correct temperature, timing, and preparation techniques is crucial for avoiding common pitfalls such as cracking, burning, or underbaking. This introduction lays the foundation for a comprehensive exploration of the baking process, offering clear instructions and expert tips to enhance the quality of your Sculpey clay projects.
Preparing the Workspace
Setting up a conducive workspace is essential before you begin baking your Sculpey clay creations. This involves three main steps to ensure a safe and efficient baking environment.
A. Setting Up Oven
The first step is to preheat your oven to the recommended temperature specific to the type of Sculpey clay you are using. Different types of Sculpey clay, such as Sculpey III, Premo Sculpey, or Sculpey Soufflé, may have varying baking temperatures. It is vital to consult the packaging or the manufacturer’s guidelines to find the correct temperature. This ensures that the clay bakes evenly and attains the desired hardness without the risk of burning.
B. Choosing Baking Surface
Selecting the right baking surface is crucial for supporting your clay pieces during the baking process. A baking tray lined with parchment paper or a ceramic tile can be an ideal surface. These materials ensure even heat distribution and prevent the clay from sticking to the surface. For larger or more intricate pieces, consider using a piece of ceramic tile, as it provides a sturdy, heat-resistant surface that can accommodate the weight and structure of the clay.
C. Preparing Workspace
Lastly, preparing your workspace is fundamental for a smooth baking process. Begin by clearing and cleaning your work surface to remove any materials that could interfere with your baking. Organize all the tools and materials you will need, such as an oven thermometer, parchment paper, and sculpting tools. Ensuring your workspace is orderly not only aids in achieving better results but also enhances safety while baking Sculpey clay.
Positioning Clay Pieces
Proper positioning of Sculpey clay pieces on your chosen baking surface is critical in the baking process. It affects not just the aesthetics of your finished pieces but also their structural integrity. This section will guide you through arranging your creations, supporting complex structures, and ensuring overall stability during baking.

A. Placing Clay on a Baking Surface
Begin by carefully arranging your Sculpey clay pieces on the baking tray or tile you’ve prepared. It’s essential to leave adequate space between each piece; this ensures that heat circulates evenly around each item, preventing underbaking or uneven curing. Plan your layout before you start placing the pieces for efficient use of space while maintaining good airflow.
B. Supporting Complex Pieces
Large or complex Sculpey sculptures may require additional support to maintain their shape during baking. Aluminum foil or a custom armature can be used for this purpose. For armatures, use materials that can withstand the baking temperature without melting or emitting harmful fumes. Shape aluminum foil into rolls or balls to support overhanging parts or to prop up elements that might slump under their weight when soft. This precaution helps preserve the intended shape of your sculptures, avoiding any distortion that might occur during the heating process.
C. Ensuring Stability
Ensuring that clay pieces are positioned flat and stable on the baking surface is crucial to prevent warping as they bake. Verify that each piece is adequately supported and touches the surface evenly without any wobble. If a piece isn’t lying flat, adjust its position or the support underneath it. Stability is particularly important for thin or flat pieces, as they tend to bend or curl at high temperatures. A ceramic tile for these pieces can provide a more stable and heat-resistant platform than a baking tray.
By carefully positioning your Sculpey clay pieces, supporting complex or heavy sculptures, and ensuring everything is stable and adequately spaced, you’ll set the stage for a successful baking process. These steps help mitigate common issues such as uneven baking, warping, or structural weakness, making beautifully baked clay pieces ready for the next stages of finishing and decoration.
How to Bake Clay Sculpey: Baking Process
The transition from meticulously shaped Sculpey clay to a finalized, solid creation occurs during baking. This critical stage demands keen attention to detail, particularly concerning baking time, temperature, and monitoring. The following segments elucidate these aspects to guide you toward achieving optimal results.
A. Baking Time and Temperature
The heart of the baking process lies in adhering to the recommended baking time and temperature, specifically furnished by the manufacturer. These parameters vary depending on the Sculpey clay variant — be it Sculpey III, Premo Sculpey, or Sculpey Soufflé — and the thickness of the item being baked. Generally, the guideline is to bake the clay at 275°F (135°C) for 15 minutes per 1/4 inch (6 mm) thickness. However, it’s imperative to consult the packaging or manufacturer’s website for precise instructions tailored to your specific clay type. Correct temperature and time settings ensure the clay properly cures without remaining soft or becoming too hard and brittle.
B. Monitoring Oven Temperature
Given the significance of maintaining the correct temperature, the use of an oven thermometer is highly recommended. Even the most reliable ovens can fall prey to temperature fluctuations or inaccuracies in their built-in thermostats. Placing an oven thermometer inside allows you to monitor the actual temperature closely, which is paramount for the even curing of Sculpey clay. Should any discrepancy between the desired and actual oven temperatures arise, adjustments can be made in real time, ensuring the baking environment is always optimal.
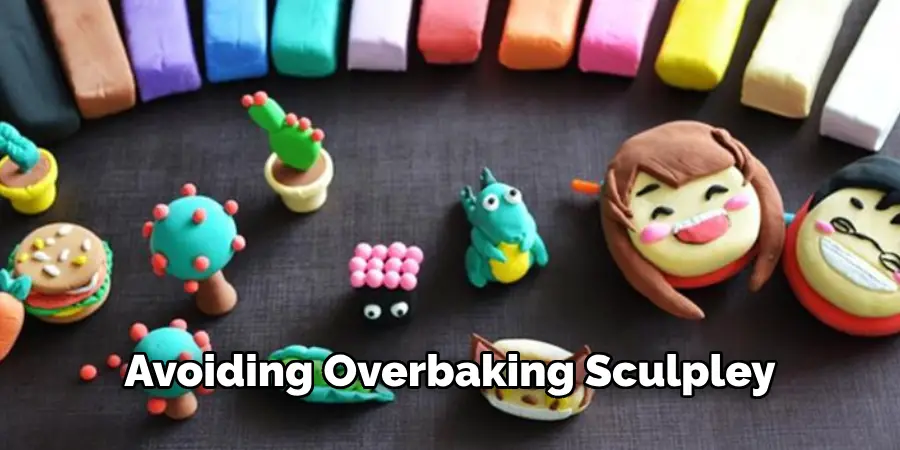
C. Avoiding Overbaking
While it might seem intuitive to bake Sculpey clay for a little extra time ‘just to be sure,’ overbaking can compromise the integrity of your project. Exceeding the recommended baking window risks not only discoloration, turning a pristine white to an unintended shade of brown but can also heighten the clay’s brittleness, increasing susceptibility to cracks or breaks. Vigilance in adhering to the stipulated baking time and temperature and diligently using an oven thermometer are your best deterrents against overbaking. Monitoring progress towards the end of the baking cycle can further mitigate any risk of exceeding the clay’s tolerance to heat.
Together, these guidelines form a comprehensive approach to baking Sculpey clay, ensuring that every piece emerges from the oven as intended, ready for the subsequent phases of your creative process.
How to Bake Clay Sculpey: Cooling and Handling
After your Sculpey clay pieces have been baked, cooling and handling them correctly is just as crucial as the earlier steps. This final phase is vital for the integrity and longevity of your creations. The sections below cover the best practices for cooling, handling, and testing your baked clay pieces.
A. Allowing for Cooling Time
Once the baking cycle is complete, allowing the clay pieces to cool down completely is imperative before attempting to handle them. This should ideally be done on the baking surface on which they were cooked. Removing the pieces from the oven but leaving them on the baking tray or tile allows them to cool gradually, minimizing the risk of thermal shock, which could lead to cracks or warping. The cooling process can take from a few minutes to over an hour, depending on the size and thickness of the pieces. Patience during this stage ensures the pieces are set correctly, achieving their final hardness and durability.
B. Handling with Care
After fully cooling the pieces, they should be handled carefully to avoid any post-baking breakage or damage. Even though Sculpey clay is much more durable after baking, thin or intricately designed pieces can still be vulnerable to stress. Use a gentle touch when picking up, moving, or working further on your clay items. Avoid applying pressure on areas that may be weaker or thinner than the rest of the piece.
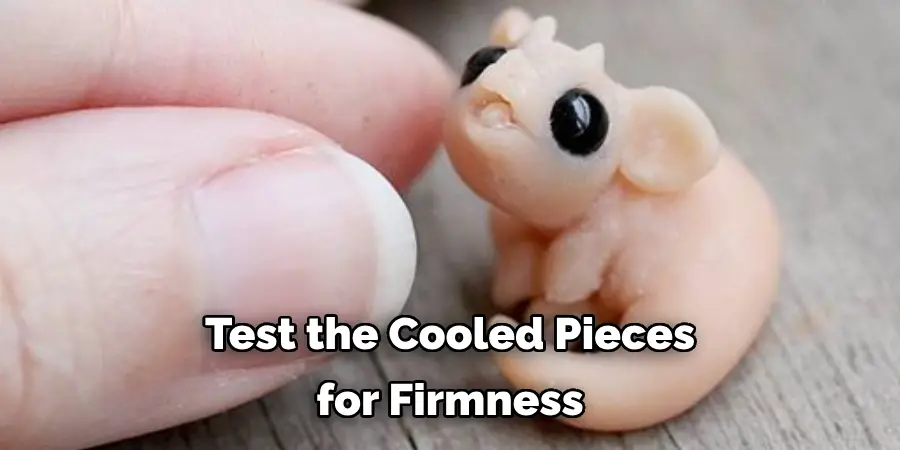
C. Testing for Completeness
Test the cooled pieces for firmness and stability to ensure the baking process has succeeded. When pressed gently, a correctly baked clay piece will feel solid and show no signs of softness. There shouldn’t be any noticeable give, and the surface should be uniformly hard throughout. If you detect any soft spots or the piece’s instability, it may indicate under-baking. Unfortunately, re-baking might not always correct this fully once the clay is under-baked and cooled, especially if significant time has passed. Testing each piece helps identify any potential issues early, allowing for corrective measures to be taken where possible.
By following these guidelines—allowing your Sculpey clay pieces to cool properly, handling them with care, and testing for baking completeness—you can ensure that your creations are aesthetically pleasing, durable, and ready for display or use in larger projects.
Troubleshooting and Tips
Successful crafting with Sculpey clay requires a creative touch and an understanding of addressing common baking issues. This section advises troubleshooting problems such as uneven baking, burnt edges, or bubble formation, along with tips for optimizing your baking conditions.
A. Addressing Common Issues
Uneven baking, burnt edges, and bubbles can mar the beauty and integrity of your Sculpey clay creations. Uneven baking often occurs due to inconsistent oven temperatures or improper positioning of your pieces within the oven. To counter this, regularly rotate your pieces and use an oven thermometer to ensure accurate temperature readings. Burnt edges can be prevented by tenting your clay with aluminum foil, which helps to deflect direct heat. Bubbles, meanwhile, indicate trapped air; to avoid them, thoroughly condition your clay and roll it out slowly to release any captured air.
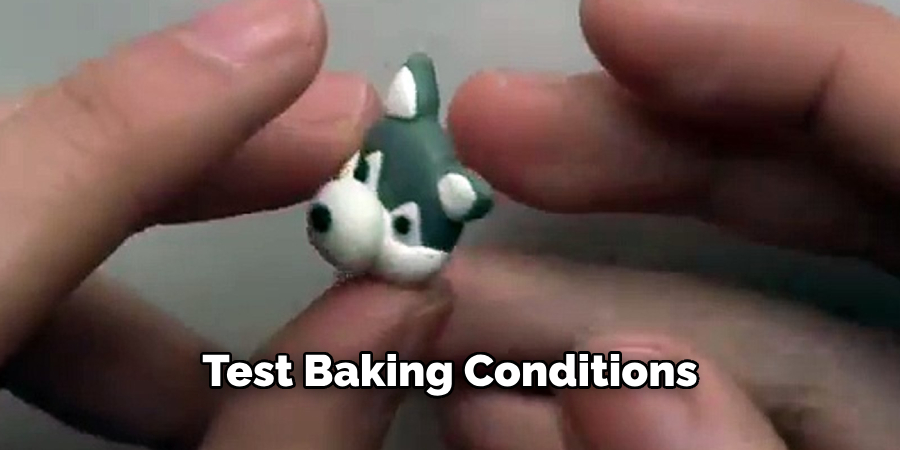
B. Testing Baking Conditions
Conducting test bakes with small clay samples effectively determines the ideal baking time and temperature for your specific oven and clay type. Use these tests to experiment with different temperatures and durations, noting which conditions yield the best results. This proactive approach saves time and prevents frustration, ensuring your final projects bake perfectly.
C. Documenting Baking Process
Keeping detailed notes on your baking conditions and the resulting outcomes can be invaluable for future projects. Document the type of clay used, oven temperature, bake time, and any issues encountered or adjustments made. This record-keeping will serve as a personal guide, helping to refine your process and achieve consistent success in your Sculpey clay creations.
5 Common Mistakes People Make When Trying to Bake Clay Sculpey
Baking polymer clay like Sculpey can be an incredibly rewarding experience. You have a vision: mold the clay with your bare hands and then cure it into your own creation in the oven. Yet, this seemingly straightforward process isn’t without its pitfalls. Novice and experienced crafters may be surprised by some of these missteps that happen frequently. Whether you’re a newcomer to the world of Sculpey or a seasoned pro, here are the top 5 mistakes to avoid when baking your colorful, pliable works of art.
1. Baking at the Wrong Temperature
Polymer clay is not like traditional clay. It “cures” rather than “dries” in the oven. Each type of Sculpey has a specific baking temperature that needs to be followed closely, or you could end up with under-cured, brittle clay. Too hot, and you’ll scorch it. Not only does temperature play a role in curing, but it also affects how colors darken in the oven. For example, translucent Sculpey can turn yellow if baked at too high a temperature. Always bake your Sculpey according to the manufacturer’s instructions to ensure thorough curing without color changes or damage.
2. Overworking the Clay
Polymer clay is often celebrated for its ability to hold fine details. However, if you manipulate it excessively, the clay will start to break down, losing its workability and adhesiveness. This is particularly a problem for soft clays such as Sculpey III, which can become crumbly and dry if overworked. Remember to take breaks during the sculpting process and give both your hands and the clay a little rest. Overworking the clay can also lead to trapped air and cracking during baking.
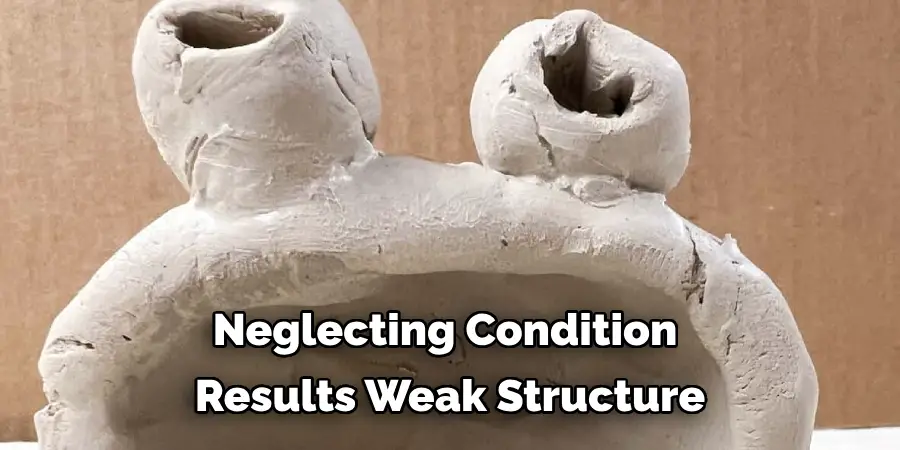
3. Neglecting to Condition the Clay
Conditioning clay is the process of kneading it until it’s pliable and soft. Neglecting to condition your Sculpey can lead to uneven curing and weak structures in your finished pieces. Start with a small amount of clay and roll it into a smooth ball, then press it flat between your hands. Fold it in half, and repeat until the clay is soft and consistent in texture. Conditioning also helps to remove air pockets, which can cause unsightly bubbles in your final piece.
4. Not Using an Oven Thermometer
Your oven’s built-in thermostat may not always be accurate. Inconsistent or inaccurate temperatures can lead to inconsistent curing of your Sculpey and can be disastrous for more advanced techniques like caning. Purchase an oven thermometer to monitor the true temperature of your oven. Place the thermometer in the middle of the oven and check it periodically to ensure it matches the required temperature for your specific clay type. It’s a small investment that can save you from a world of trouble.
5. Baking for the Wrong Duration
Baking your Sculpey for too long can cause it to burn or even release potentially harmful fumes. On the other hand, underbaking can result in a soft and easily breakable piece, as it has not fully cured. Always set a timer and follow the recommended baking times, usually ranging from 15 minutes to an hour, depending on the thickness of your project. Check for a matte finish if you’re unsure if your piece is baking correctly. A shiny finish may indicate that your piece needs more time in the oven.
Frequently Asked Questions (FAQs)
Q1: Can I Bake Sculpey Clay More than Once?
A1: Yes, Sculpey clay can be baked multiple times, especially useful for projects requiring additional components or for correcting under-baked portions. Ensure that each baking session follows the recommended time and temperature guidelines.
Q2: What Should I Do if My Clay Cracks After Baking?
A2: Minor cracks can often be repaired with liquid Sculpey or a similar clay adhesive. Apply the adhesive to the crack, add a small amount of fresh clay if needed, and rebake the piece according to the standard baking instructions.
Q3: How Can I Prevent My Sculpey Clay from Browning or Burning?
A3: Cover your clay project with aluminum foil during baking to prevent browning or burning. This protects the clay from direct heat. Additionally, monitor the temperature with an oven thermometer to ensure accuracy.
Q4: Is It Necessary to Use an Oven Thermometer?
A4: Yes, using an oven thermometer is highly recommended for baking Sculpey clay. Oven temperatures can fluctuate and might not be accurately reflected by the oven’s dial, leading to under or overbaking.
Q5: Can I Bake Sculpey Clay with Metal or Glass Inclusions?
A5: Sculpey clay can be baked with metal or glass inclusions. However, be mindful of the material’s thermal properties, as they may heat differently than the clay. Always conduct a test bake to ensure the final piece will come out as expected.

Conclusion
In summary, successful Sculpey clay projects involve critical steps, from conditioning your clay and shaping your designs to the precise execution of baking guidelines. This detailed guide has walked you through each phase, ensuring your Sculpey clay creations emerge exactly as envisioned. Proper baking techniques are the linchpin for achieving your projects’ durability and aesthetic quality, emphasizing why understanding how to bake clay Sculpey correctly cannot be understated. It turns potential pitfalls into opportunities for mastery and creative expression.
We encourage you to follow these steps closely and experiment within the parameters of safe and recommended practices. Exploring different baking methods can unveil unique results, adding depth and character to your creations. Whether you’re a beginner or a seasoned crafter, the journey of learning and experimentation never truly ends. By continuously refining your process, you’ll discover the vast potential that Sculpey clay has to offer, paving the way for endless artistic exploration.
About the Author
Adrien Rowe, an expert in knitting, fiber arts, and bookbinding, promotes sustainability and creativity through workshops and tutorials. Passionate about education and community, he inspires crafters of all levels to learn, share, and grow in a supportive, idea-driven environment.
Professional Focus
Specializes in advanced knitting techniques, fiber manipulation, and textile innovation.
Expert in book arts, including cotton papermaking, handmade paper techniques, and bookbinding.
Dedicated to educating and inspiring crafters of all skill levels through tutorials, workshops, and hands-on learning experiences.
Passionate about creating a supportive community where makers can share ideas, learn, and grow.
Education History
Rhode Island School of Design (RISD) – Bachelor of Fine Arts (BFA) in Textiles.
University of Iowa Center for the Book – Master of Fine Arts (MFA) in Book Arts.
Expertise:
Advanced knitting, fiber manipulation, papermaking, bookbinding, sustainability-focused crafting, educational workshops, creative tutorials, and fostering a supportive maker community.