Crocheting is a wonderfully creative and relaxing craft that allows you to produce beautiful and functional items with just a hook and yarn. One captivating project you can undertake is crocheting a head, which could serve as the starting point for a doll, an artistic sculpture, or even a quirky hat.
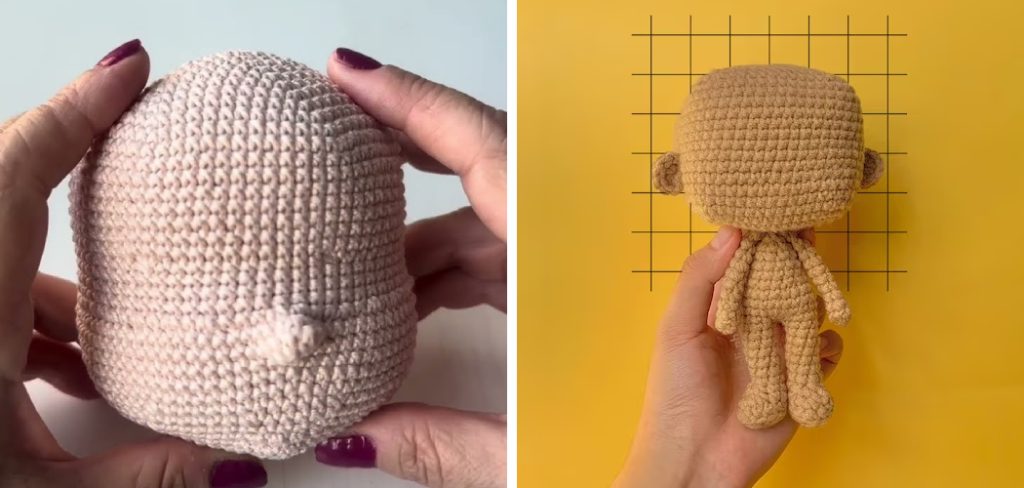
This guide is designed to introduce beginners and seasoned crocheters alike to the basic steps of creating a crocheted head, ensuring clarity and ease throughout the process. Whether you’re aiming to craft a keepsake, a gift, or an innovative piece of home decor, this guide on how to crochet a head will set you on the right path with detailed instructions and helpful tips.
What is Crocheting?
Crocheting is a fiber art that involves creating fabric from yarn or thread using a crochet hook. It’s similar to knitting, but instead of using two needles, you only need one hook to work stitches onto a foundation chain. The word ‘crochet’ is derived from the French term ‘croche’ which means ‘hook.’ With origins dating back to the early 19th century, crocheting has evolved into various techniques and styles, allowing for endless possibilities in design and creativity.
Benefits of Crocheting
Crocheting has been known to have numerous benefits, both for the mind and body. One of the most appealing aspects is that it can be done almost anywhere and at any time, making it a convenient and enjoyable pastime. Here are some other notable benefits of crocheting:
- Reduces Stress and Anxiety
- Improves Fine Motor Skills and Hand-eye Coordination
- Increases Focus and Concentration
- Boosts Creativity and Self-expression
- Produces a Sense of Accomplishment and Satisfaction
- Promotes Relaxation and Mindfulness
Materials You Will Need
Before we delve into the steps of crocheting a head, here are some essential materials you will need:
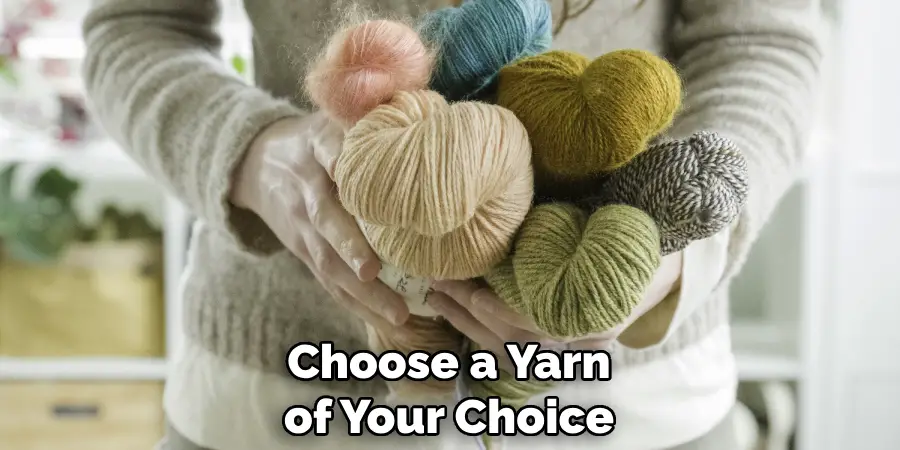
Yarn:
Choose a yarn of your choice in terms of color, weight, and texture. You can experiment with different types of yarn to achieve unique results.
Crochet Hook:
Choose a crochet hook that is suitable for your chosen yarn weight. The size of the hook will determine the size of your stitches and ultimately, the size of your head.
Stuffing:
To give your crocheted head shape and volume, you will need stuffing material such as polyester fiberfill, cotton batting, or yarn scraps.
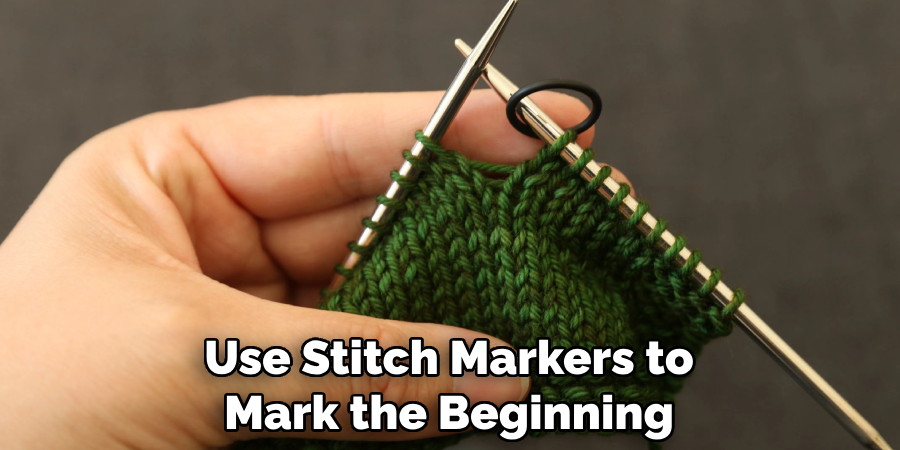
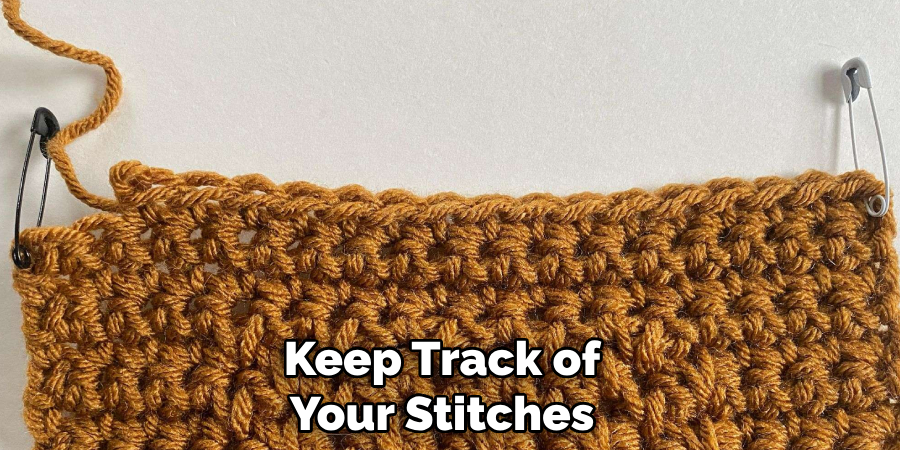
Stitch Markers:
These are useful tools for keeping track of your stitches and ensuring consistent shaping throughout your project.
10 Simple Step-by-step Guidelines on How to Crochet a Head
Step 1: Pattern Selection and Preparation
Choose a crochet pattern for a head or create your own. Make sure to have all the necessary materials and tools ready before you begin. Otherwise, prepare the yarn by winding it into a ball and have your crochet hook and stuffing nearby. You could also create a foundation chain with your chosen yarn and hook to use as a base for the starting round.
It’s essential to have a clear understanding of the pattern before you proceed. You can use stitch markers to mark the beginning and end of each round. But if you’re creating your own pattern, simply proceed with the following steps. You can also find various free patterns and tutorials online for inspiration.
Step 2: Start with a Magic Ring (optional)
If your chosen pattern calls for it, start with a ‘magic ring‘ instead of a foundation chain. This technique creates a tight and seamless starting point, allowing for a smooth and neat appearance at the top of your head. But if you are more comfortable with a foundation chain, that is also acceptable. The number of stitches in the starting round will determine the size and shape of your head.
It’s recommended to start with six single crochet stitches in the first round. If you’re using a foundation chain, make sure to slip stitch into the first chain to join and form a ring. You will be working in rounds for the rest of your project.
Step 3: Work in Continuous Rounds
Instead of joining each round with a slip stitch, work in continuous rounds to avoid a visible seam on your head. Use a stitch marker to mark the beginning of each round and move it up a stitch as you progress. But if your pattern calls for joining rounds, then do so accordingly. You will still achieve the desired shape and size of a crocheted head. But for a seamless look, working in continuous rounds is recommended. The number of rounds you work on will depend on your pattern and the size of your head. It’s usually around 10-20 rounds.
Step 4: Increase Rounds
To shape your head and make it wider as you move upwards, you will need to increase the number of stitches in each round. There are various techniques to do this, but the most common is to work two single crochet stitches into one stitch from the previous round. This will double your stitch count and create a gradual increase in size.
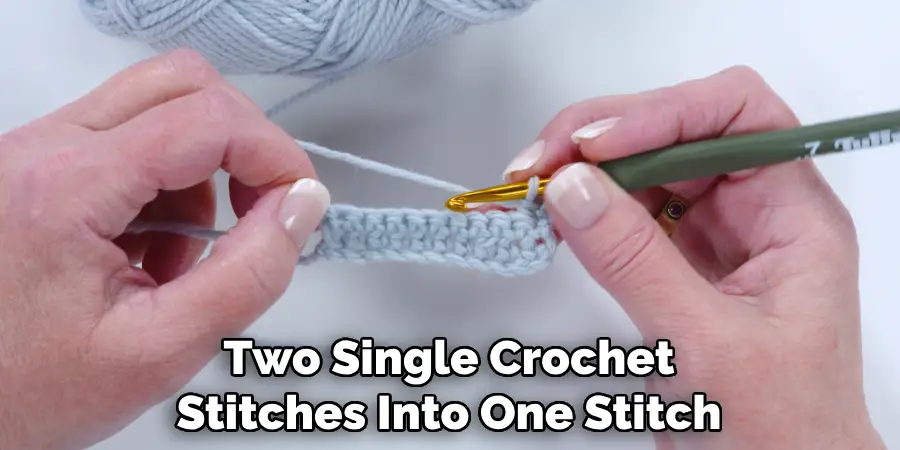
Remember to follow the pattern instructions for the placement of increases. It’s also essential to keep track of the number of stitches in each round to avoid mistakes. You can use stitch markers to mark increases as well. It’s recommended to do increases every second or third round for a smooth and even shape.
Step 5: Shape the Face
Depending on your desired outcome, you may need to shape the face by decreasing stitches in certain areas. This will create a curve and provide the definition for facial features. Again, there are various techniques for decreasing, with the most crocheting being single crochet two stitches together. This will reduce your stitch count and create a gradual decrease in size.
Follow the pattern instructions for the placement of decreases and keep track of the number of stitches as well. You may also need to stuff your head as you go along to maintain the desired shape. It’s recommended to stuff your head firmly but not too tightly. There should be no visible gaps or holes in the stitches.
Step 6: Add Eyebrows
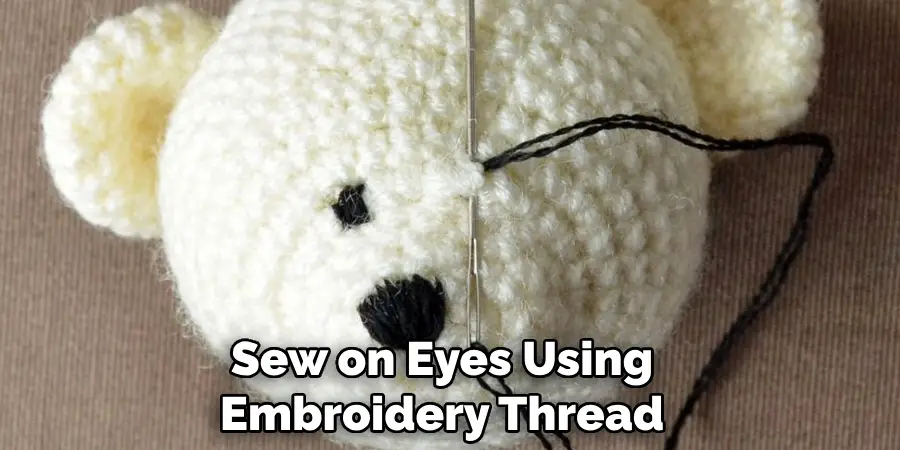
To add eyebrows, use either a slip stitch or single crochet stitches to create small lines above the eyes. You can also use a different color of yarn for the eyebrows to make them stand out. Alternatively, you can use embroidery thread or felt to create eyebrows and sew them onto the head. But this is optional and depends on your preference. The placement of eyebrows will also depend on your desired expression for the head. You can experiment with different positions and shapes to achieve the desired look. The same goes for adding other facial features such as eyes and mouth.
Step 7: Create Eyes
To create eyes, use safety eyes or beads or crochet small circles using a contrasting yarn color. The size and placement of the eyes will depend on your pattern and the size of your head. For larger heads, you can also add eyelashes by attaching long strands of yarn or embroidery thread at the outer corners of the eyes. Again, this is optional and depends on your preference. But it can add a cute and playful touch to your crocheted head.
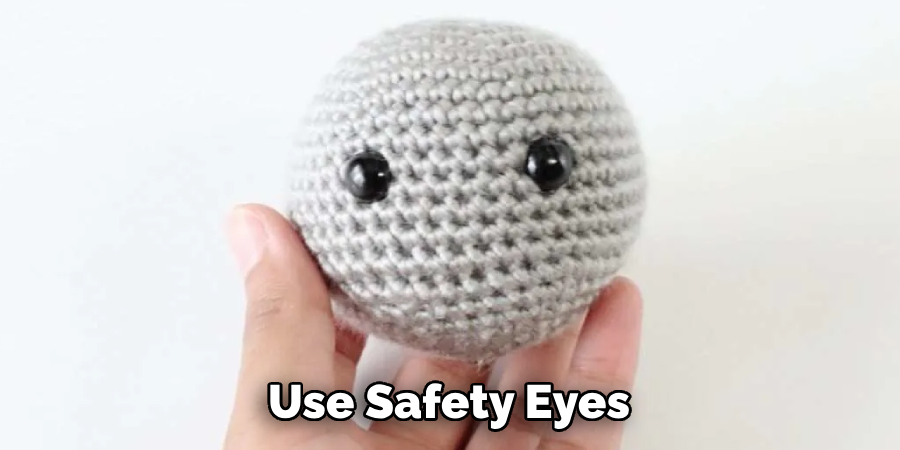
It’s recommended to attach the eyes securely by knotting or sewing them onto the head. If using safety eyes, make sure they are correctly attached and cannot be pulled out. It’s also essential to use child-safe materials if you are making a crocheted head for a child.
Step 8: Form Nose and Mouth
To create a nose and mouth, use either slip stitches or single crochet stitches on the lower part of your head. You can use a different color of yarn to differentiate these features from the rest of your head. For smaller heads, you may also need to use a smaller hook or thinner yarn to create delicate features. Alternatively, you can also embroider the nose and mouth using embroidery thread or felt. It’s recommended to experiment with different shapes and sizes for these features until you achieve the desired look. You can also add a small smile or frown to give your crocheted head a unique expression.
Step 9: Add Hair
To add hair, use strands of yarn or crochet long chains and attach them to the top of your head. You can also use different colors to create highlights or mix yarn types for a textured look. Alternatively, you can use embroidery thread to sew on hair or create braids and attach them to the head. This step is where you can get creative and experiment with different styles and techniques to achieve unique looks for your crocheted head. Although this step is optional, adding hair can add character and personality to your creation.
Step 10: Finish Off
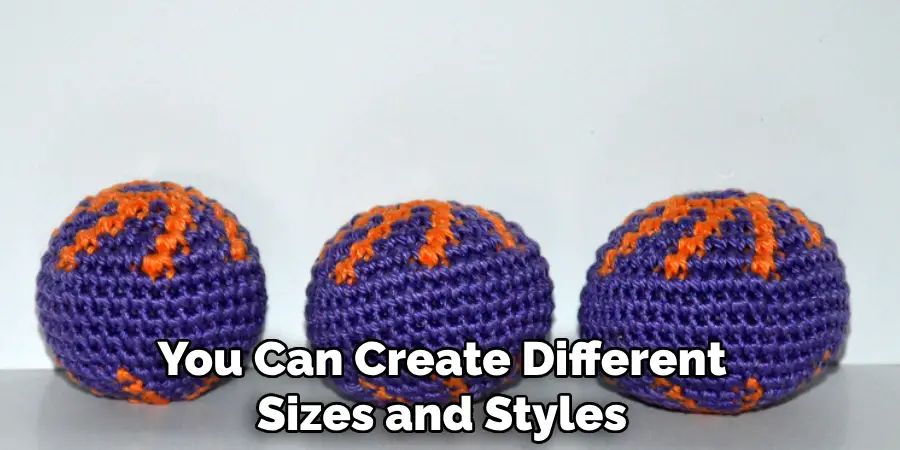
Once you have completed all the necessary steps, fasten off your yarn and weave in any loose ends. You can also stuff the head with more filling if needed before closing up any openings. Your crocheted head is now complete and ready to be used in various projects. You can attach it to a body or use it as a stand-alone decoration. The possibilities are endless, and with enough practice, you can create different sizes and styles of crocheted heads for all your crafting needs! So go ahead and have fun creating unique and adorable heads with your crochet skills.
Following these steps on how to crochet a head and using your own creativity, you can make a variety of crocheted heads to use in different projects. From dolls and stuffed animals to home decor and accessories, crocheted heads add a personalized touch and bring character to any project. So grab your yarn and hook, and start creating! There’s no limit to what you can achieve with crochet.
Do You Need to Take Help From Professionals?
If you are new to crocheting or struggling with any of the steps mentioned above, don’t be afraid to seek help from professionals. You can join online communities and forums where experienced crocheters share their knowledge and provide guidance. You can also take classes or workshops to learn specific techniques or improve your skills.
Remember that everyone starts as a beginner, and practice makes perfect. With dedication and patience, you can master the art of crocheting heads in no time. So don’t hesitate to reach out for help when needed and keep on creating! Now that you know how to crochet a head, let your imagination run wild and create beautiful and unique pieces with this versatile skill.
Tips and Techniques for Success
- Use a Stitch Marker to Keep Track of Rounds and Increase/decrease Placements.
- Stuff Your Head Firmly but Not Too Tightly for the Best Shape and Stability.
- Experiment With Different Yarn Types, Colors, and Techniques to Create Unique Looks for Your Crocheted Head.
- Practice Makes Perfect! Don’t Be Afraid to Try New Things and Keep Practicing to Improve Your Skills.
- Have Fun and Let Your Creativity Flow! Crochet is an Art, so Don’t Be Afraid to Add Your Personal Touch and Make Each Head One-of-a-kind.
- Use High-quality Materials for Best Results. This Includes Yarn, Stuffing, Hooks, and Other Tools.
- Follow Pattern Instructions Carefully but Also Feel Free to Make Small Changes to Achieve Your Desired Outcome.
- Keep Track of Your Stitches and Use a Row Counter or Pen and Paper to Avoid Mistakes.
- Don’t Be Discouraged if It Takes a Few Tries to Get the Hang of Crocheting Heads. With Practice and Patience, You’ll Soon Master This Skill! So keep practicing, have fun, and happy crocheting! We hope you enjoyed this tutorial on how to crochet a head and that it inspires you to create many unique and adorable heads for your crafting projects. Remember, the possibilities are endless, so let your imagination run wild and have fun with crochet!
Customization and Personalization Options
- Use Different Yarn Colors and Types to Create Different Hair Styles, Skin Tones, Eye Colors, Etc.
- Add Embellishments Such as Bows, Hats, Glasses, or Other Accessories for a Personal Touch.
- Experiment With Different Facial Features and Expressions for Unique Looks.
- Vary the Size of Your Head by Using Different Hook Sizes and Adjusting the Number of Stitches in Each Round.
- Use Different Stitch Patterns and Techniques to Create Textured or Patterned Heads.
- Mix and Match Different Techniques, Such as Crocheting Eyes and Embroidering a Mouth, for Unique Combinations.
- Create a Family of Heads With Different Shapes, Sizes, and Personalities.
- Share Your Creations With Others or Use Them to Decorate Your Home or Give as Gifts! The Possibilities Are Endless When It Comes to Customizing and Personalizing Your Crocheted Heads. So Get Creative and Make Each Head Unique and Special! and Don’t Forget to Share Your Creations With Others to Spread the Joy of Crochet.
Care and Maintenance of Crocheted Heads
- Spot Clean With a Damp Cloth or Gentle Hand Wash Using Mild Soap.
- Shape and Air Dry Flat to Maintain the Head’s Form.
- Avoid Pulling or Tugging on the Head Too Hard, Especially if it Has Safety Eyes.
- Store in a Cool, Dry Place to Avoid Fading or Damage From Moisture.
- Give Your Crocheted Head Some Love and Care to Keep It Looking Beautiful for Years to Come! With Proper Maintenance, Your Crocheted Heads Will Last for a Long Time and Bring Joy to You and Others. Happy Crafting!
Frequently Asked Questions
Q: Can I Use Different Types of Yarn for Crocheting Heads?
A: Yes, you can use any type of yarn, but it’s recommended to use a soft and durable material suitable for toys or decorations. You can also mix and match different yarns for a unique look. The only important thing is to use the same yarn type throughout your project for consistent results.
Q: Do I Need to Use Safety Eyes for My Crocheted Heads?
A: It’s recommended to use safety eyes, especially if the head will be given to young children or used as a toy. If safety eyes aren’t available, you can embroider or sew on eyes using embroidery thread or buttons.
Q: Can I Sell My Crocheted Heads?
A: Yes, you can sell your crocheted heads as long as they are made from your own pattern and not copied from someone else’s work. If using a pattern from another source, make sure to follow their terms and conditions for selling the finished product.
Q: How Long Does It Take to Crochet a Head?
A: The time it takes to crochet a head depends on the size, complexity, and skill level. With practice, you’ll become faster at crocheting heads and can complete them in less time. It’s also recommended to take breaks and not rush the process to avoid mistakes.
Conclusion
By now, you should have a good understanding of the basic steps required to crochet a head. Remember, crocheting is as much about the process as it is about the result. Don’t be discouraged by mistakes; they’re part of the learning curve. Each stitch and round brings you closer to mastering this craft and allows your creativity to flourish.
Whether you’re making a doll for a special someone, an artistic piece, or simply challenging yourself with a new project, keep practicing and experimenting. With patience and persistence, you’ll find that crocheting heads can be a rewarding addition to your crafting repertoire. Thanks for reading this article on how to crochet a head.
About the Author
Adrien Rowe, an expert in knitting, fiber arts, and bookbinding, promotes sustainability and creativity through workshops and tutorials. Passionate about education and community, he inspires crafters of all levels to learn, share, and grow in a supportive, idea-driven environment.
Professional Focus
Specializes in advanced knitting techniques, fiber manipulation, and textile innovation.
Expert in book arts, including cotton papermaking, handmade paper techniques, and bookbinding.
Dedicated to educating and inspiring crafters of all skill levels through tutorials, workshops, and hands-on learning experiences.
Passionate about creating a supportive community where makers can share ideas, learn, and grow.
Education History
Rhode Island School of Design (RISD) – Bachelor of Fine Arts (BFA) in Textiles.
University of Iowa Center for the Book – Master of Fine Arts (MFA) in Book Arts.
Expertise:
Advanced knitting, fiber manipulation, papermaking, bookbinding, sustainability-focused crafting, educational workshops, creative tutorials, and fostering a supportive maker community.