When working with clay, one of the most frustrating challenges can be preventing it from drying out. Whether you’re a seasoned sculptor or a newcomer to the craft, understanding how to keep your clay malleable and ready for use is crucial. Dried-out clay can become difficult, if not impossible, to work with, leading to wasted materials and potential hindrance to your artistic process.

This guide on how to keep clay from drying outa aims to provide you with effective strategies and tips to keep your clay at the perfect consistency for as long as you need it. From proper storage techniques to hydration tips, we’ll cover everything you need to know to keep your clay workable, preserving its quality and extending its lifespan.
Understanding the Types of Clay: Air-Dry vs. Kiln-Fired
One of the first things you need to understand when working with clay is that there are two main types: air-dry and kiln-fired. Knowing which type of clay you have on hand can help determine the best methods for keeping it from drying out.
Air-Dry Clay
Air-dry clay does not require a kiln for firing; instead, it hardens when exposed to air over time. This type of clay is typically more porous and prone to drying out quickly. It can be a great option for beginners or for creating smaller, less detailed pieces.
Kiln-Fired Clay
Kiln-fired clay, also known as ceramic clay, requires high temperatures in a kiln for it to harden and become permanent. This type of clay is often used for creating more intricate and durable pieces, but it can also dry out quickly if not stored properly.
Needed Materials
Before we dive into the methods for keeping your clay moist, you’ll need to gather a few essential materials. These include:
Airtight Containers Such as Plastic Bags or Sealable Plastic Containers:
These will be used to store your clay and prevent air exposure.
Water Spray Bottle:
This will come in handy for adding moisture to dry clay.
Plastic Wrap:
Plastic wrap can also be used to cover your clay while working on a project, preventing it from drying out too quickly.
11 Step-by-step Guidelines on How to Keep Clay From Drying Outa
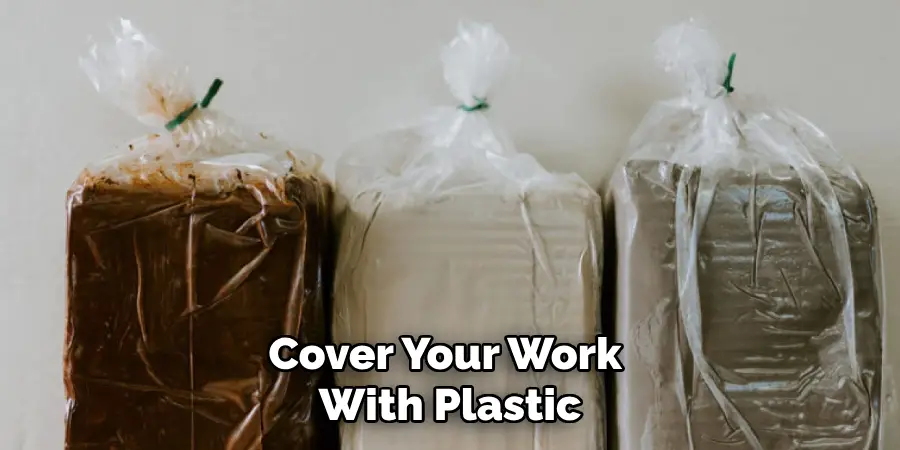
Step 1: Keep Your Clay Covered
When not working with your clay, it’s important to keep it covered with plastic wrap or in an airtight container. This will prevent air exposure and slow down the drying process. You can also mist the clay with water before covering it to add additional moisture. But be careful not to add too much water as it can make the clay too soft and difficult to work with. It’s best to check the clay periodically and adjust the moisture as needed. The goal is to keep the clay soft and pliable, not wet. If you notice any dry spots, simply mist them with water and cover the clay again.
Step 2: Store Your Clay in a Cool, Dry Place
Proper storage is essential for preventing your clay from drying out. Avoid storing it in direct sunlight or near a heat source, as this can cause the clay to dry out faster. Instead, keep it in a cool, dry place like a basement or closet. You can also add a damp cloth or paper towel to the container with your clay to help maintain moisture. But be sure to check on the cloth regularly and replace it if it becomes dry.
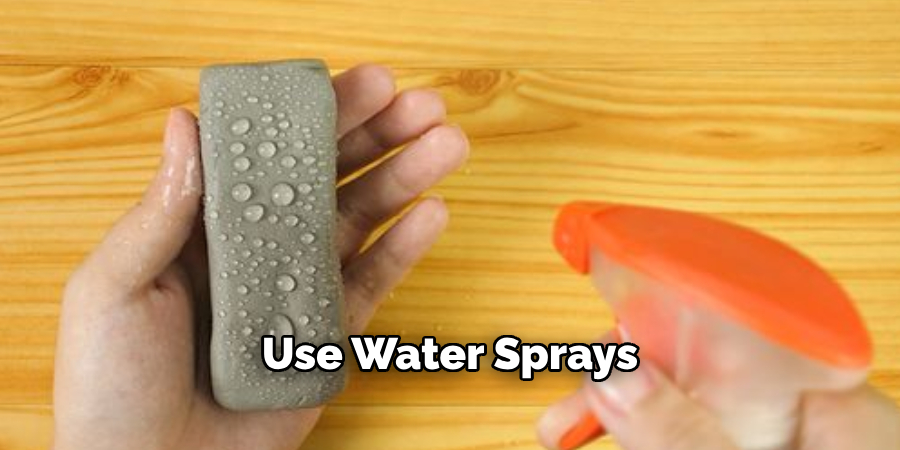
Step 3: Use a Water Spray Bottle While Working
If you notice your clay starting to dry out while working on a project, use a water spray bottle to add moisture. This will help keep the clay pliable and prevent cracking. Just remember not to overdo it with the water, as it can negatively affect the clay’s texture and make it difficult to work with. If you find the clay is becoming too wet, let it sit out for a few minutes before continuing to work with it. You can also use plastic wrap to cover the clay between sessions to keep it from drying out.
Step 4: Avoid Using a Damp Sponge
Some people may suggest using a damp sponge to keep clay moist while working. However, this method is not recommended as sponges can hold too much water, make the clay too wet, and make it difficult to work with. There is also a risk of introducing bacteria and mold to your clay if the sponge is not properly cleaned. It’s best to stick with using a water spray bottle instead. It’s more precise and less likely to cause any issues. You can also use your fingers to lightly mist the clay if you don’t have a spray bottle on hand.
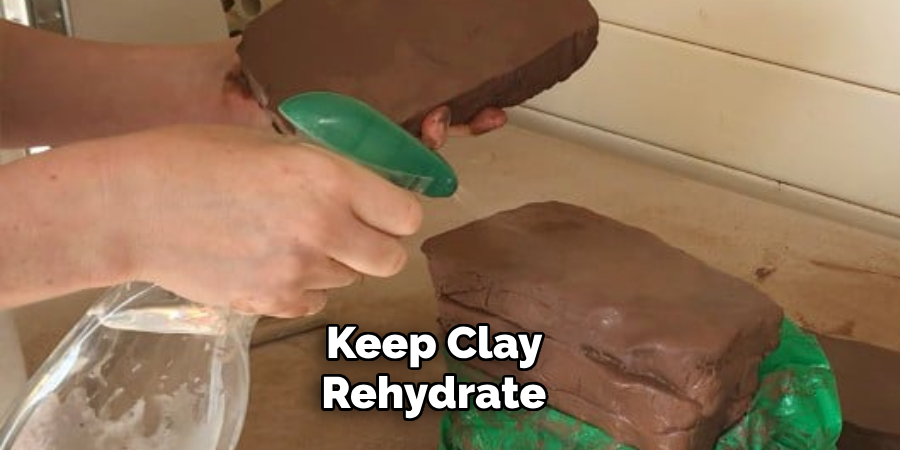
Step 5: Try Using Clay Softener
If your clay has already dried out, you can try using a clay softener to revive it. These products are designed specifically for rehydrating dried-out clay and restoring its workability. Follow the instructions carefully and add the softener gradually, as adding too much can make the clay too soft and mushy. If you don’t have a clay softener on hand, you can also try using a few drops of glycerin or baby oil to bring back moisture to your clay.
Step 6: Cover Your Work in Progress
Suppose you’re working on a project that will take multiple sessions; be sure to cover it with plastic wrap or store it in an airtight container between sessions. This will help prevent the clay from drying out and maintain its workability until your next session. If you’re using air-dry clay, it’s important to note that these pieces can take several days or even weeks to fully dry and harden. So be sure to keep them covered and monitor their moisture levels regularly until they are completely dry. You can also use a water spray bottle to add moisture if needed.
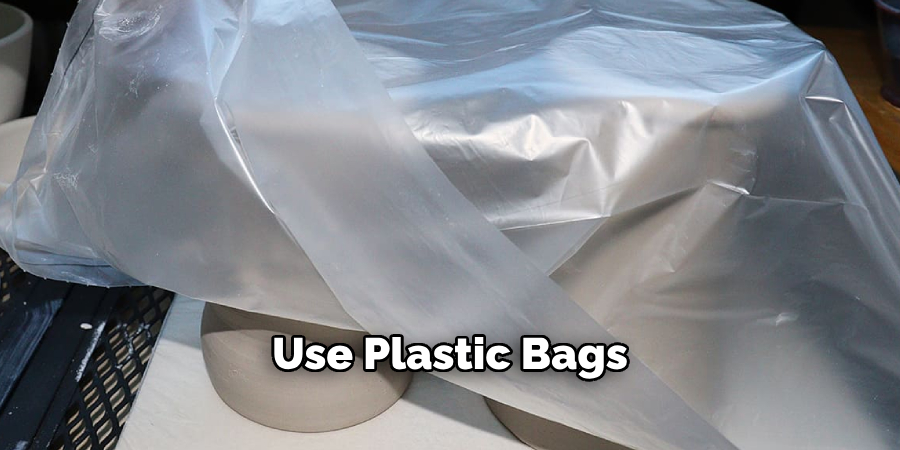
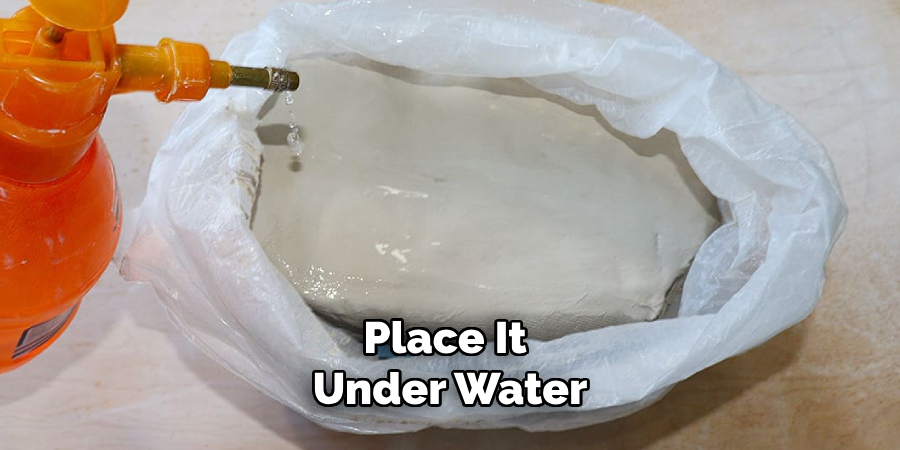
Step 7: Use a Plastic Bag
If you’re using kiln-fired clay and are not able to finish your project in one session, you can store it in a plastic bag with a damp cloth or paper towel. This will help keep the clay moist and prevent it from drying out too quickly. Just be sure to check on the clay and replace the damp cloth as needed. The plastic bag will also help to prevent any air exposure, which can cause the clay to dry out faster. It’s best to use this method only if you’re unable to finish your project in a reasonable amount of time, as it is not a long-term storage solution.
Step 8: Use Slip
Slip, also known as liquid clay, can be used to add moisture back into dried-out clay. Simply dab some slip onto the dry areas and gently smooth it out with your fingers. Be sure to also cover the piece with plastic wrap or store it in an airtight container afterward to prevent any further drying. You can make your own slip by mixing water and clay until it forms a runny consistency. This method is best for minor touch-ups and not for fully dried-out pieces.
Step 9: Keep Your Tools Clean
Dirty tools can introduce bacteria, mold, or other contaminants to your clay, which can affect its moisture levels and potential for cracking. Be sure to clean your tools regularly, especially if you notice any mold or bacteria growth. This will help maintain the integrity of your clay and prevent it from drying out prematurely. You can use rubbing alcohol or a solution of bleach and water to clean your tools.
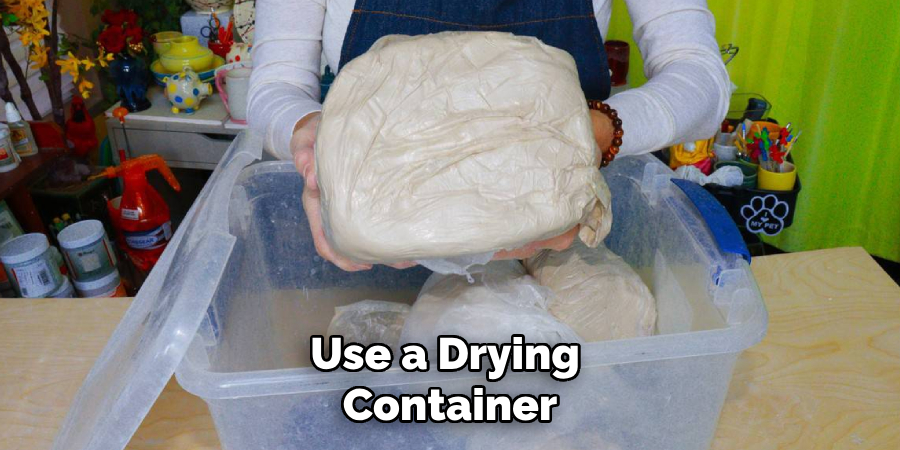
Step 10: Use a Drying Box
If you’re working with multiple pieces of clay and don’t have enough containers to store them individually, you can create a drying box using a plastic storage container. Simply line the bottom of the container with a damp cloth or paper towel, place your clay pieces on top, and cover them with another damp cloth. Close the lid tightly to create a sealed environment that will help maintain moisture levels. This can also be used for air-dry clay projects to prevent them from drying out too quickly. Just be sure to check on the clay and replace the damp cloths regularly.
Step 11: Experiment with Different Clay Types
Different types of clay have different moisture levels and may require different methods for maintaining their workability. If you’re still having trouble with your current clay, consider trying a different type or brand to see if it works better for you. Some clays are naturally more prone to drying out, so it’s important to find one that works well for your specific needs. You can also experiment with different techniques and tools to find the best way to keep your clay moist while working on your projects. With a little practice and experimentation, you’ll be able to create beautiful and durable clay creations without any issues of drying out.
Following these tips and tricks on how to keep clay from drying outa can help ensure that your clay stays moist and workable throughout your project. Remember to always keep an eye on the moisture levels and make adjustments as needed. With proper care, you can enjoy creating with clay without any interruptions or frustrations caused by dryness. Happy crafting!
Reclaiming Dry Clay for Reuse
If you do end up with dried-out clay, don’t worry! You can still reclaim it for reuse. Here’s how:
- Gather your dry clay and break it into small pieces or grind it into a powder using a rolling pin, hammer, or mortar and pestle.
- Place the broken pieces or powder in a container of water (use the ratio of 1 part clay to 2 parts water).
- Let it soak for a few hours or even overnight.
- Stir the mixture and break up any larger chunks that may still be present.
- Once the clay has fully dissolved, pour off any excess water and spread the clay on a flat surface to dry.
- You can then store your reclaimed clay in an airtight container until you’re ready to use it again.
DIY Clay Humidification Chambers
If you’re working with clay that is prone to drying out quickly or if you live in a dry climate, you may benefit from creating a humidification chamber for your clay projects. Here are two simple methods for making your own DIY humidity chambers:
Plastic Bag Method:
Place your project and a damp cloth or paper towel inside a plastic bag and seal it tightly. This will help trap moisture and prevent air exposure. Check on the clay periodically and replace the damp cloth as needed.
Plastic Container Method:
- Place a sponge or a layer of pebbles at the bottom of a plastic container.
- Add water until the sponge or pebbles are fully saturated (but not floating in water).
- Place your project on top of the sponge or pebbles and cover the container tightly.
- Check on your clay periodically and add more water as needed to maintain moisture levels.
Remember, it’s important to regularly check and replace any damp materials used in these methods to prevent mold or bacteria growth.
Troubleshooting Dry Clay Issues
If you’ve followed all the steps and tips mentioned above but are still experiencing issues with dry clay, here are a few troubleshooting tips:
- Check the type of clay you’re using and make sure it’s suitable for your specific project. Some clays may be more prone to drying out quickly.
- Monitor the humidity levels in your workspace and adjust them as needed. A dehumidifier or humidifier can help regulate the environment.
- Use a clay conditioner or softener to add moisture back into your clay if it’s starting to feel dry while you’re working with it.
- Consult with other experienced clay artists for tips and advice on how they keep their clay moist and workable.

By taking proper care of your clay and using these tips and tricks, you can prevent any issues with dryness and create beautiful clay creations without any interruptions. Happy crafting!
Best Practices for Long-Term Storage
If you have leftover clay that you want to store for future use, here are a few best practices to ensure its longevity:
- Wrap the clay tightly in plastic wrap or store it in an airtight container.
- Place the wrapped clay in a cool and dark place, away from direct sunlight and heat sources.
- Check on the clay periodically and add moisture if needed.
- Use your clay within a few months for best results.
- If you’re storing air-dry clay, make sure it’s completely dry before sealing it in a container.
By following these best practices, you can ensure that your leftover clay stays fresh and workable for future projects.
Frequently Asked Questions
Q1: Can I Revive Completely Dried Out Clay?
A1: Yes, you can reclaim completely dried-out clay by soaking it in water and breaking it down into a paste-like consistency. Check out the ‘Reclaiming Dry Clay for Reuse’ section above for detailed instructions. It’s important to note that reclaimed clay may not have the same consistency as fresh clay, so it’s best used for smaller or less detailed projects.
Q2: Is There a Way to Slow Down the Drying Process of Air-Dry Clay?
A2: Yes, you can slow down the drying process of air-dry clay by wrapping it tightly in plastic wrap or storing it in an airtight container. You can also use the DIY humidification chamber methods mentioned above to maintain moisture levels while working with your clay. But keep in mind that air-dry clay will eventually dry out, so it’s important to use it within a few days for best results.
Q3: Can I Rehydrate Dried Out Clay by Adding Water?
A3: Yes, you can add water to dried-out clay to rehydrate it, but be careful not to add too much. Start with a small amount and gradually add more as needed. It’s also important to knead and work the clay thoroughly to evenly distribute the moisture. But keep in mind that clay that has been rehydrated may not have the same consistency as fresh clay, so it’s best used for smaller or less detailed projects.
Conclusion
Clay is a versatile and enjoyable medium for creating beautiful art pieces. With the right techniques and proper care, you can keep your clay moist and workable throughout your project. Use slip, clean tools regularly, create a drying box or humidification chamber, and experiment with different types of clay to find the best method for keeping your specific projects from drying out. And if they do dry out, don’t worry – you can always reclaim and reuse your clay. Follow these tips and tricks on how to keep clay from drying outa for successful clay projects every time! So, keep creating and have fun with your clay creations!
About the Author
Adrien Rowe, an expert in knitting, fiber arts, and bookbinding, promotes sustainability and creativity through workshops and tutorials. Passionate about education and community, he inspires crafters of all levels to learn, share, and grow in a supportive, idea-driven environment.
Professional Focus
Specializes in advanced knitting techniques, fiber manipulation, and textile innovation.
Expert in book arts, including cotton papermaking, handmade paper techniques, and bookbinding.
Dedicated to educating and inspiring crafters of all skill levels through tutorials, workshops, and hands-on learning experiences.
Passionate about creating a supportive community where makers can share ideas, learn, and grow.
Education History
Rhode Island School of Design (RISD) – Bachelor of Fine Arts (BFA) in Textiles.
University of Iowa Center for the Book – Master of Fine Arts (MFA) in Book Arts.
Expertise:
Advanced knitting, fiber manipulation, papermaking, bookbinding, sustainability-focused crafting, educational workshops, creative tutorials, and fostering a supportive maker community.