Paper mache clay is a versatile and easy-to-use crafting material that can bring your artistic ideas to life. Unlike traditional paper mache that relies on strips of paper dipped in adhesive, paper mache clay can be modeled and sculpted, offering a greater range of creative possibilities.
This introduction on how to make paper Mache clay will guide you through the basic ingredients and steps involved in making your own paper Mache clay at home.
Whether you’re planning to create detailed sculptures, decorative items, or engaging in fun projects with kids, learning to make paper mache clay is a valuable skill for craft enthusiasts of all levels.
What is Paper Mache Clay?
Paper mache clay is a mixture of paper, glue, and other materials that can be used as a sculpting medium. It is lightweight, easy to mold, and air-dries to a hard finish. This makes it ideal for creating three-dimensional objects such as masks, figurines, and even small furniture pieces.
The key ingredient in paper mache clay is paper pulp, which is made by blending newspaper or other recycled paper with water. The resulting mixture can then be mixed with different types of glue and other materials to create a clay-like consistency that can be shaped and molded.
The beauty of paper mache clay is that it can be customized to suit different types of projects. For example, adding more glue and less water will result in a sturdier clay that dries faster, perfect for creating larger and more durable pieces. On the other hand, adding more water will create a thinner consistency, which is ideal for finer details and intricate designs.
Why Make Your Own Paper Mache Clay?
While you can easily purchase pre-made paper Mache clay from craft stores, there are many benefits to making your own at home. For starters, it is a cost-effective alternative as you only need a few basic ingredients that are readily available.
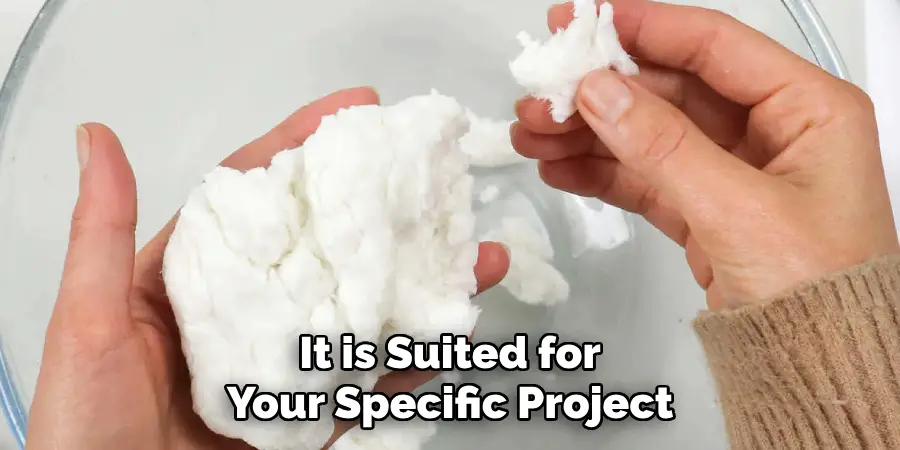
Additionally, by making your own paper Mache clay, you have the freedom to experiment with different ingredients and ratios to achieve the desired consistency and texture. This allows you to create a custom blend that is best suited for your specific project.
Moreover, making your own paper mache clay is a fun and creative process in itself. It offers an opportunity for artistic expression and encourages resourcefulness by utilizing recycled materials. Plus, it is a great activity to do with kids, as they can get involved in the mixing and molding process.
Materials Needed
To make your own paper mache clay at home, you will need the following materials:
Newspaper or Any Other Type of Paper:
Newspaper is a common choice for paper mache clay as it is easily accessible and has the ideal texture for creating pulp. However, you can use any type of paper such as tissue paper, printer paper, or even cardboard.
Water:
Water is needed to create the paper pulp by blending it with the chosen paper. The amount of water used will determine the consistency of the final clay.
White Glue:
White glue is a key ingredient in paper mache clay as it acts as a binder, holding the paper pulp together. You can use any type of white glue such as Elmer’s or even make your own using flour and water.
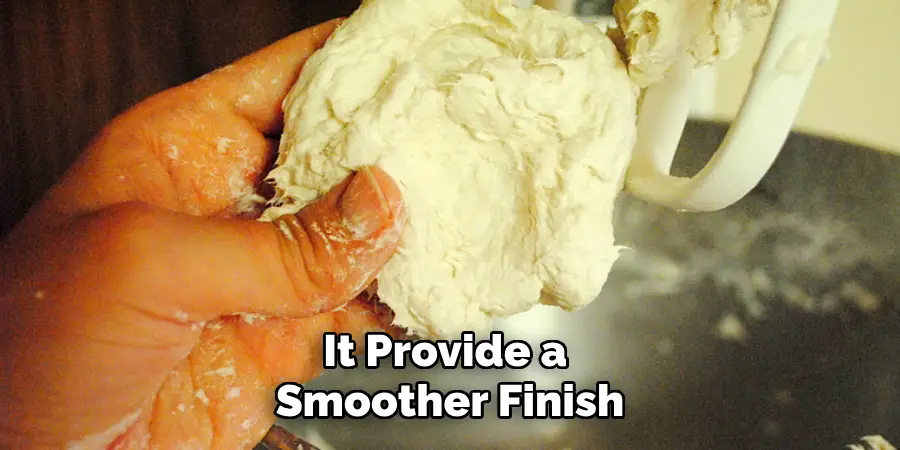
Joint Compound:
A joint compound is a thick paste commonly used in construction to fill in gaps and cracks. It can also be used in paper Mache clay to provide a smoother finish and help the clay stick to different surfaces.
Cornstarch:
Cornstarch is often added to paper mache clay to create a thicker consistency that is easier to mold and sculpt. It also helps prevent cracking as the clay dries.
10 Step-by-step Guidelines on How to Make Paper Mache Clay
Step 1: Prepare Your Work Area
Before starting, make sure you have a clean and spacious work area where you can mix and mold the paper mache clay without any distractions. Cover the surface with a plastic sheet or newspaper to protect it from getting messy. You may also want to wear old clothes or an apron to protect your clothing. The paper mache clay can get sticky, so it’s best to be prepared. It’s always a good idea to have a bowl of water and some paper towels nearby for easy clean-up.
Step 2: Tear the Paper into Small Pieces
Rip the newspaper or paper of your choice into small pieces. This will help speed up the blending process and ensure a smoother consistency. The pieces do not have to be perfect; they should just be arranged into manageable sizes. But do not shred the paper as it will result in a lumpy pulp. The goal is to create small bits that can be easily blended into a smooth mixture. It’s best to have a large pile of paper pieces ready before moving on to the next step. The amount of paper you need will depend on the size and number of objects you want to create.
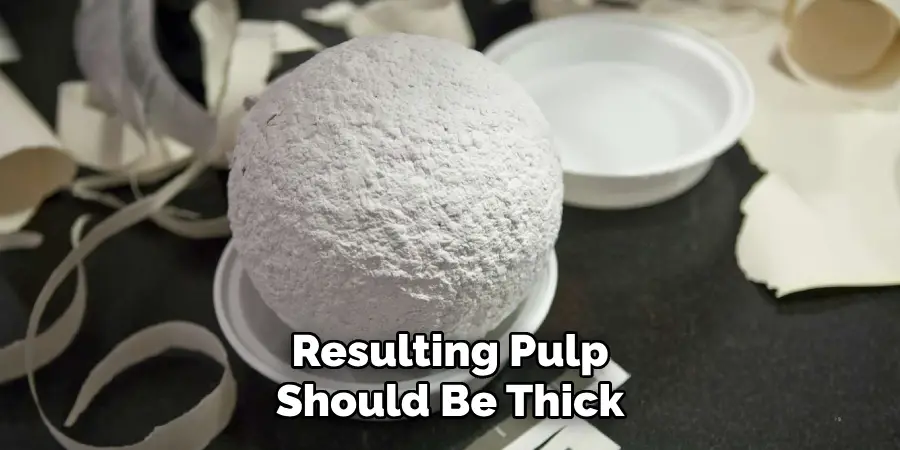
Step 3: Create Paper Pulp
Fill a large bowl or bucket with warm water and add the torn paper pieces. Let them soak for at least an hour until they become saturated and soft. Then, use your hands or a blender to mix the paper pieces until they form a smooth pulp. If using a blender, add small amounts of paper at a time to avoid overloading it. The resulting pulp should be thick and easy to spread. It’s best to prepare the paper pulp in batches rather than trying to blend all of it at once.
Step 4: Squeeze Out Excess Water
Using your hands, squeeze the excess water out of the paper pulp by gently pressing it against the sides of the bowl or using a strainer. You want the pulp to be damp but not soaking wet. The less water in the pulp, the faster it will dry and harden. But be careful not to squeeze out too much water as it will result in a dry and crumbly mixture. You can always add a bit of water back in later if needed.
Step 5: Add White Glue
In a separate bowl, mix together white glue and water until they are well combined. The ratio of glue to water can vary depending on how thick or thin you want your final clay to be. A good starting point is one part glue to two parts water. You can always add more or less depending on your desired consistency. Then, pour this mixture into the paper pulp and mix well. It will help bind the paper fibers and create a sticky clay-like consistency. But be careful not to add too much glue as it can make the mixture too thick and difficult to work with.
Step 6: Add Joint Compound
Next, add a joint compound to the mixture in small increments. Mix well after each addition until it is fully incorporated. The amount of joint compound you need will depend on the desired texture and consistency of your paper mache clay. It’s best to start with a small amount and gradually add more until you reach the desired result. The joint compound will also act as a preservative, making your paper mache clay last longer without molding.
Step 7: Add Cornstarch (Optional)
If you want a thicker and more pliable clay, add cornstarch to the mixture. Again, start with small amounts and mix well until it reaches the desired consistency. The cornstarch will make the clay easier to mold and sculpt, but be careful not to add too much as it can make the mixture too dry and difficult to work with. The perfect amount may vary depending on the humidity in your environment. You can always add more water if needed.
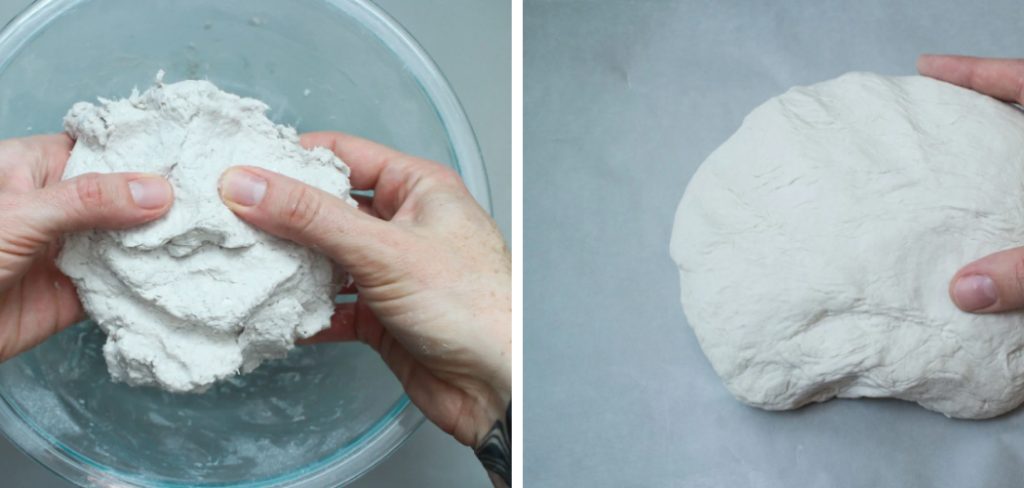
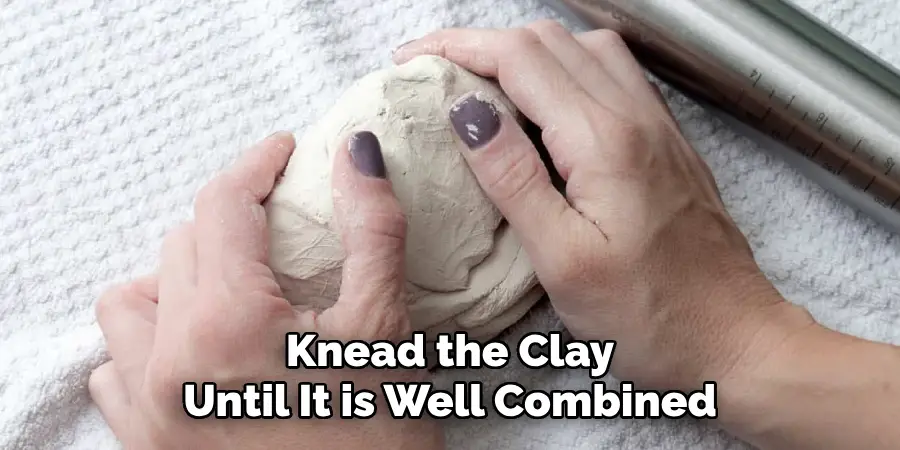
Step 8: Mix and Knead the Clay
Once all the ingredients are added, mix and knead the clay until it is well combined. You should have a smooth, pliable mixture that holds its shape when molded. If the clay seems too wet or runny, you can add more paper pulp or cornstarch. If it’s too dry and crumbly, you can add more glue or water. It may take a few tries to find the perfect consistency, so don’t be afraid to experiment. The clay can be stored in an airtight container for future use. But, if you are not using it immediately, cover the surface of the clay with plastic wrap to prevent it from drying out.
Step 9: Use Your Paper, Mache Clay
Your paper mache clay is now ready to use! You can start molding and sculpting it into any shape or form you desire. It’s best to work in layers, allowing each layer to dry before adding another one. This will help prevent cracking and ensure a strong and sturdy finished product. You can also use various tools to create textures or add details to your paper mache clay sculptures. It’s a versatile material that can be used for a wide range of projects, including masks, figurines, home decor, and more. The possibilities are endless!
Step 10: Let the Clay Dry Completely
Once you are satisfied with your creation, set it aside to dry completely. The drying time will vary depending on the size and thickness of your project, as well as the humidity in your environment. It can take anywhere from a few hours to a few days for the clay to dry completely. You can speed up the process by placing it in front of a fan or using a hairdryer on low heat. But be careful not to overheat and crack the clay. Once it is fully dried, you can paint, decorate, or seal it however you like.
Following these steps on how to make paper mache clay will help you create a strong and durable paper mache clay that can be used for a variety of projects. Remember to have fun and let your creativity flow! And don’t forget to protect your clothing by having water and paper towels nearby for easy clean-up. Now, go create something amazing with your homemade paper mache clay!
Troubleshooting Common Issues
- If the paper mache clay is too wet and runny, you can add more paper pulp or cornstarch to thicken it.
- If the paper mache clay is too dry and crumbly, you can add more glue or water to make it more pliable.
- If the clay cracks while drying, you may have added too many layers without allowing each layer to dry completely. Next time, try working in thinner layers and letting them dry before adding more.
- If the clay starts to mold, it may have been exposed to too much moisture. Make sure to store it in an airtight container and let it fully dry between uses.
- If you are having trouble getting the desired texture or consistency, don’t be afraid to experiment with different ratios of ingredients until you find what works best for your project.
- Always make sure to protect your work surface and clothing before starting any paper mache project.
- And most importantly, have fun and let your creativity flow! Paper Mache clay is a versatile material that allows for endless possibilities. Let your imagination run wild!

Additional Tips
- You can add acrylic paint or food coloring to your paper mache clay for a colored finish. Just mix it in before adding the joint compound.
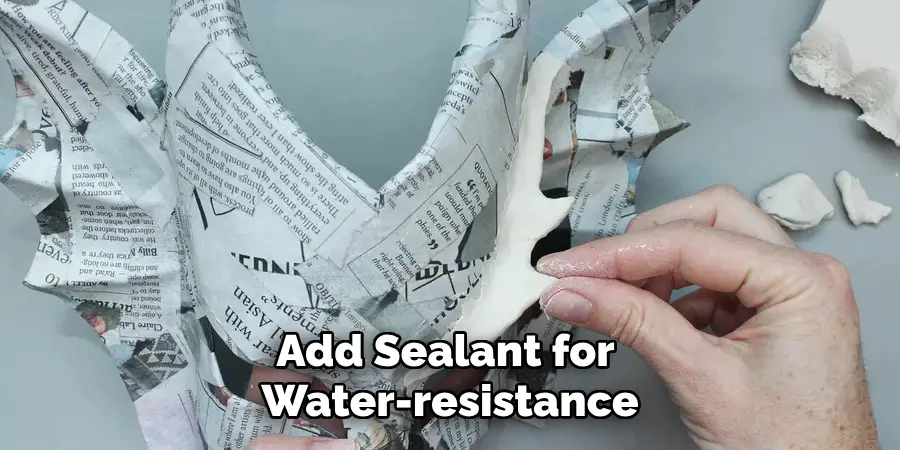
- To make your paper mache clay more durable and water-resistant, you can add a layer of sealant such as Mod Podge or clear acrylic sealer once it has fully dried.
- If you want a smoother finish on your project, you can sand the dried paper mache clay with fine-grit sandpaper before painting or sealing.
- To create a stronger and more durable finished product, consider using strips of cloth or gauze in between layers of paper mache clay. This will add extra strength and prevent cracking.
- Have fun experimenting with different textures by adding materials such as glitter, beads, or tissue paper to your paper mache clay.
- When working on a larger project, it may be helpful to use an armature made out of wire or cardboard. This will provide structure and support for your paper mache clay while it dries.
- Don’t be afraid to make mistakes! Paper mache is a forgiving medium that allows you to make changes and corrections as you go. Enjoy the process and have fun creating something unique!
Frequently Asked Questions
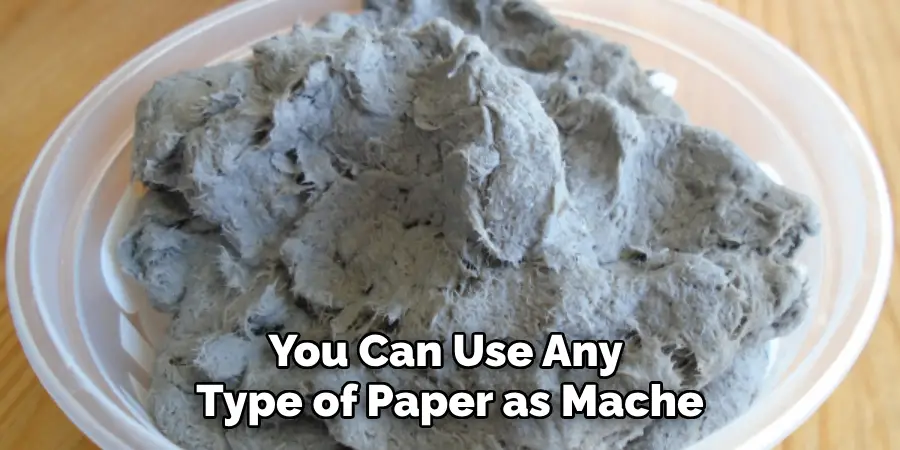
Q: Can I Use Any Type of Paper to Make Paper Mache Clay?
A: Yes, you can use any type of paper such as newspaper, tissue paper, or printer paper. Just make sure to shred it into small pieces before adding it to your mixture. You can also use paper towels or toilet paper for a smoother finish. But, avoid using glossy or coated paper as it may not break down properly. It’s best to use plain, unprinted paper for the most cost-effective option.
Q: Can I Use Other Types of Glue?
A: Yes, you can use other types of glue such as white school glue or wood glue. Just keep in mind that the consistency and drying time may vary depending on the type of glue used. Experiment with different types to see what works best for your project. The key is to have a smooth, pliable mixture that holds its shape when molded.
Q: Is Paper Mache Clay Safe for Kids to Use?
A: Yes, paper mache clay is non-toxic and safe for kids to use. However, adult supervision is recommended as it involves handling small pieces and using sharp tools. It’s also important for kids to wash their hands after using paper mache clay, as it can be messy. It’s always best to use caution and safety measures when crafting with any materials.
Q: How Long Does Paper Mache Clay Last?
A: When stored in an airtight container, paper mache clay can last for several weeks or even months. Just make sure to keep it away from moisture to prevent molding. If you notice any signs of mold, discard the clay and make a fresh batch. You can also extend the shelf life by adding a layer of sealant or storing it in a cool, dry place.
Q: Can I Use Paper Mache Clay to Create Outdoor Projects?
A: While paper Mache clay is not completely waterproof, you can make it more water-resistant by adding a layer of sealant. This will help protect your project from moisture and allow it to withstand outdoor conditions. However, for long-term durability, it’s best to keep paper Mache clay projects indoors.
Conclusion
In wrapping up our comprehensive guide on creating and troubleshooting paper mache clay, we’ve explored everything from the basic recipe, necessary materials, and step-by-step instructions to expert tips and answers to frequently asked questions. Whether you are a beginner seeking to try your hand at a new craft or an experienced artist looking to refine your skills, paper mache clay offers a versatile and accessible medium for all.
Remember to experiment with different techniques and materials to discover what works best for your unique projects. By following the guidelines on how to make paper Mache clay provided and allowing your creativity to flow freely, you’re well on your way to crafting beautiful, durable, and unique creations with paper Mache clay. Happy crafting!
About the Author
Adrien Rowe, an expert in knitting, fiber arts, and bookbinding, promotes sustainability and creativity through workshops and tutorials. Passionate about education and community, he inspires crafters of all levels to learn, share, and grow in a supportive, idea-driven environment.
Professional Focus
Specializes in advanced knitting techniques, fiber manipulation, and textile innovation.
Expert in book arts, including cotton papermaking, handmade paper techniques, and bookbinding.
Dedicated to educating and inspiring crafters of all skill levels through tutorials, workshops, and hands-on learning experiences.
Passionate about creating a supportive community where makers can share ideas, learn, and grow.
Education History
Rhode Island School of Design (RISD) – Bachelor of Fine Arts (BFA) in Textiles.
University of Iowa Center for the Book – Master of Fine Arts (MFA) in Book Arts.
Expertise:
Advanced knitting, fiber manipulation, papermaking, bookbinding, sustainability-focused crafting, educational workshops, creative tutorials, and fostering a supportive maker community.