Introducing the slab roller, a versatile tool revolutionizing the world of pottery with its efficiency and precision. Whether you’re a novice ceramic artist or a seasoned professional, mastering the art of using a slab roller opens up a realm of creative possibilities. Unlike traditional hand-rolling methods, a slab roller offers consistent thickness and uniformity, allowing for intricate designs and complex shapes with ease.
In this article, we delve into how to use a slab roller, exploring its various features, techniques, and applications in ceramic craftsmanship. From crafting functional vessels to sculptural masterpieces, the slab roller empowers artists to unleash their imagination and bring their visions to life with unparalleled precision. Join us as we embark on a journey to unlock the full potential of this indispensable tool, revolutionizing the way we approach pottery and paving the way for limitless creative expression.
Significance of Slab Rolling in Pottery
The role of slab rolling in pottery cannot be overstated. This technique revolutionizes ceramic art by providing a foundation for consistency and creativity. For artists, the slab roller is not merely a tool but an extension of their creative intent, allowing for the mass production of uniformly thick slabs that serve as the blank canvas for their art. The importance of slab rolling extends beyond its utility; it represents a shift towards innovation in a craft that is deeply rooted in tradition.
By simplifying the process of slab preparation, it grants artists more time to focus on design and detailing, thereby elevating the quality and complexity of ceramic works. The advent of slab rolling has also democratized pottery, making it accessible to a broader range of artists and enthusiasts by eliminating the need for extensive manual skill in slab preparation. This pivotal tool thus stands at the crossroads of tradition and modernity, empowering artists to explore new horizons in pottery while respecting the craft’s rich heritage.
Understanding the Slab Roller
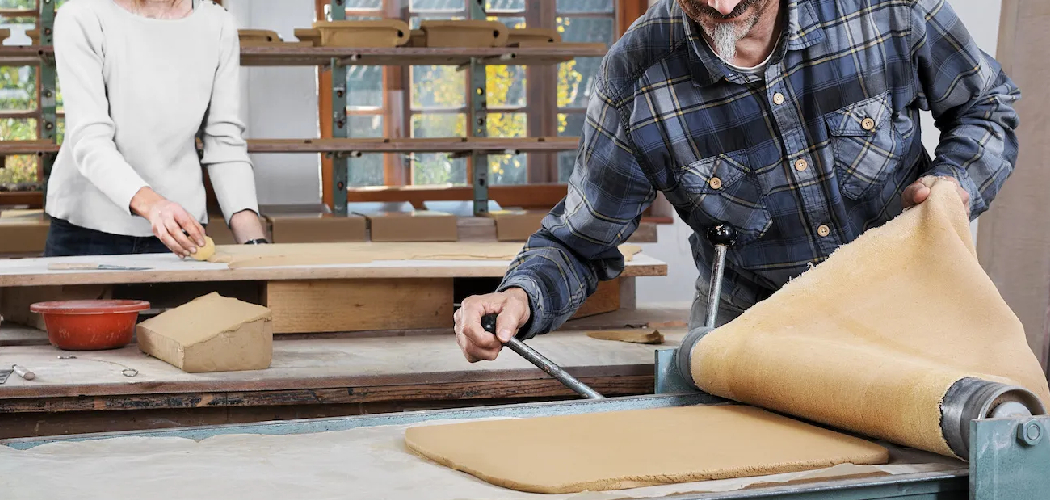
A slab roller, fundamentally, is a mechanical device used to flatten clay into uniform slabs of desired thickness. At its core, the slab roller consists of two parallel rollers encased within a frame. These rollers can be adjusted to various heights, allowing for precise control over the thickness of the clay slab. The process begins by placing a lump of clay between two sheets of canvas or fabric, which helps in evenly distributing the pressure and preventing the clay from sticking to the rollers.
As the clay is fed through the rollers, a crank is turned either manually or with the aid of an electric motor, drawing the clay through and compressing it into a slab. The simplicity of this operation masks the intricate science behind slab rolling – the uniform pressure applied over the surface of the clay ensures not only uniform thickness but also homogenous drying and firing, which are crucial for the structural integrity of the finished piece.
Understanding how to effectively use a slab roller involves more than just feeding clay through rollers; it requires a nuanced appreciation of the clay’s consistency, the importance of canvas or fabric barriers, and the incremental adjustments needed for the desired slab thickness. This foundational knowledge sets the stage for experimentation and mastery, which in turn, leads to innovation in form and design within the realm of ceramic arts.
Types of Slab Rollers
Slab rollers come in various designs and sizes, each suited to different needs, spaces, and scales of production. The primary types include:
Tabletop Slab Rollers
Compact and portable, tabletop slab rollers are ideal for hobbyists or small studios with limited space. These rollers sit comfortably on a table or bench, offering a convenient solution for artists who require mobility and flexibility without sacrificing quality. Despite their smaller size, tabletop models are capable of producing slabs of considerable size and thickness, making them a versatile choice for personal projects and smaller-scale works.
Large Floor Models
Designed for professional studios and educational settings, large floor models are robust and capable of handling large volumes of clay. These slab rollers are fixed on sturdy frames and often come equipped with large crank handles or electric motors to facilitate the rolling process. Their capacity to produce slabs of various sizes and consistent thickness makes them indispensable for artists working on larger pieces or producing ceramics at a higher volume.
Electric Slab Rollers
Electric slab rollers offer the convenience of motorized operation, reducing physical effort and increasing efficiency. This type is particularly beneficial for artists producing large quantities of work or those with physical limitations that make manual rolling challenging. Electric models provide precise control over the slab thickness and speed of operation, allowing for smooth, consistent results.
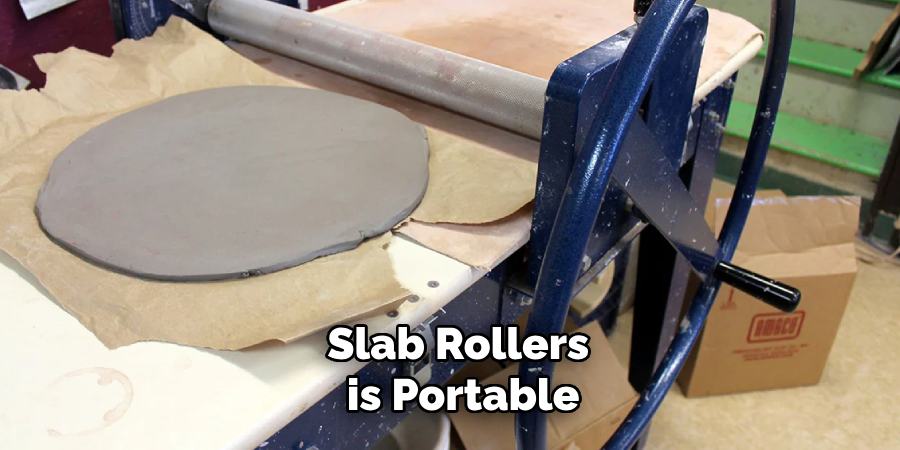
Portable Slab Rollers
For artists who work in multiple locations or conduct workshops, portable slab rollers are a practical solution. These models are designed for easy transportation and quick setup, often featuring foldable or detachable parts. While they may not accommodate the largest slab sizes, they offer remarkable flexibility and convenience for artists on the move.
Each type of slab roller has its unique advantages, and the choice largely depends on the artist’s specific needs, the volume of work being produced, and available workspace. Understanding the features and limitations of different slab rollers empowers artists to select the best tool for their creative endeavors, ensuring efficiency, quality, and satisfaction in their ceramic artistry.
Thickness Adjustment Mechanisms
One of the most critical aspects of a slab roller is its thickness adjustment mechanism, as it directly affects the precision and versatility of the slabs produced. This feature allows artists to control the thickness of the clay slab, ranging from paper-thin sheets to thicker slabs suitable for sculptural projects. The adjustment mechanisms vary between models but generally fall into two categories: manual adjustment systems and automated adjustment systems.
Manual Adjustment Systems

Manual adjustment systems typically involve turning knobs or screws to set the distance between the rollers, thereby controlling the thickness of the slab. This method requires a hands-on approach, allowing artists to feel the adjustments and make precise changes as needed. Although manual adjustments can be time-consuming and require a bit of trial and error to achieve the desired thickness, they offer a high degree of control and are often preferred for their tactile feedback and simplicity.
Automated Adjustment Systems
Automated adjustment systems, often found on electric slab rollers, use electronic controls to set the rollers at the desired thickness. These systems can provide consistent results with less manual effort and can be particularly useful in educational settings or production studios where time efficiency and uniformity are crucial. Some advanced models even feature digital displays that show the exact thickness of the slab, ensuring unparalleled accuracy.
Regardless of the type, the ability to adjust the thickness of slabs with precision is fundamental to producing quality ceramic pieces. Whether an artist prefers the hands-on feel of manual adjustments or the ease and consistency of automated systems, the choice of thickness adjustment mechanism plays a significant role in the functionality and versatility of a slab roller. Mastery over this aspect allows ceramicists to push creative boundaries, experimenting with various slab thicknesses to achieve new forms and textures in their work.
10 Methods How to Use a Slab Roller
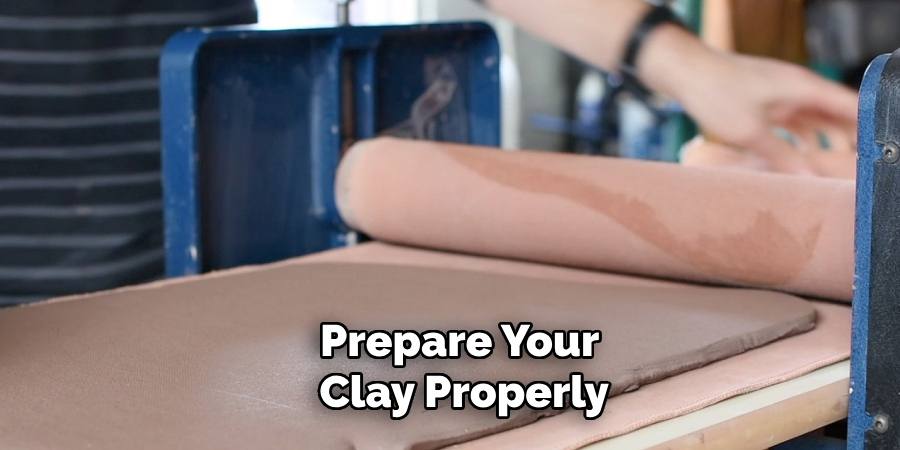
1. Preparing the Clay:
Before using the slab roller, it’s crucial to prepare your clay properly. Start by wedging the clay to remove air bubbles and ensure a consistent texture. Wedging also aligns the clay particles, making it easier to work with. Once wedged, divide the clay into manageable portions to feed through the slab roller.
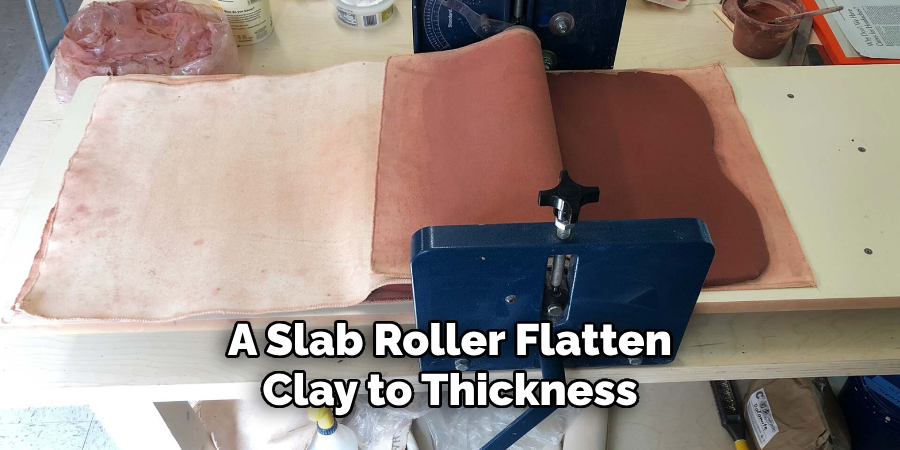
2. Adjusting the Thickness:
Most slab rollers come with a thickness adjustment mechanism that allows you to control the thickness of your clay slab. Begin by setting the desired thickness on the roller. For larger projects or thicker slabs, start with a higher thickness setting and gradually decrease it as needed.
3. Feeding the Clay:
Place a portion of clay onto the canvas or cloth-covered surface of the slab roller. Ensure that the clay covers the width of the roller evenly to prevent uneven rolling. Position the clay in the center of the roller to maintain balance and stability during the rolling process.
4. Rolling the Clay:
Turn the handle of the slab roller to feed the clay through the rollers. Apply gentle and consistent pressure to guide the clay through the machine. Avoid exerting too much force, as this can distort the slab or cause it to tear. As the clay passes through, it will flatten into a uniform slab of the desired thickness.
5. Repeating the Process:
Depending on the size and quantity of slabs needed for your project, repeat the feeding and rolling process with additional portions of clay. Take care to maintain consistent thickness throughout the rolling process by adjusting the thickness setting as needed.
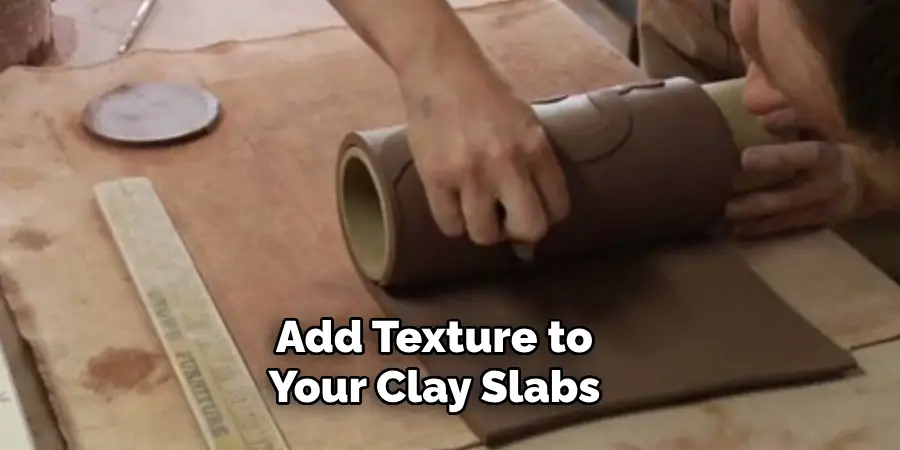
6. Creating Texture:
To add texture to your clay slabs, consider using textured rollers, stamps, or texture mats. Place the textured surface face-down on the clay before rolling it through the slab roller. This will imprint the texture onto the clay, adding visual interest and depth to your finished pieces.
7. Joining Slabs:
If your project requires joining multiple slabs together, ensure that the edges are properly prepared before joining. Score the edges with a serrated rib tool and apply slip (a mixture of clay and water) to create a strong bond. Gently press the edges together and use a rib or smoothing tool to blend the seams seamlessly.
8. Forming Shapes:
Once you have rolled out your clay slabs, use templates, molds, or hand-building techniques to shape them into desired forms. Cut the slabs to size using a wire cutter or knife, then manipulate them into shapes such as cylinders, bowls, or tiles. Use additional tools like ribs, paddles, and modeling tools to refine the forms and add detail as needed.
9. Drying and Handling:
After forming your clay pieces, allow them to dry slowly and evenly to prevent cracking. Use drying racks, plaster bats, or other supports to elevate the pieces during drying and promote even airflow. Once dry, handle the pieces with care to avoid damage before firing.
10. Firing the Pieces:
Once fully dried, fire the clay pieces in a kiln according to the specific requirements of the clay and glazes used. Follow proper firing schedules and temperature guidelines to ensure successful firing and achieve desired results. Be mindful of any special considerations, such as preheating the kiln or using firing supports for delicate pieces.
Wedging and Kneading Techniques
Wedging and kneading clay are essential processes in ceramic arts, crucial for preparing the material before it’s shaped into its final form. These techniques are aimed at accomplishing several key objectives: to homogenize the clay, eliminate air bubbles, and ensure an even moisture content throughout the material. The quality of the finished ceramic piece significantly depends on the meticulousness of these preparatory steps.
Wedging
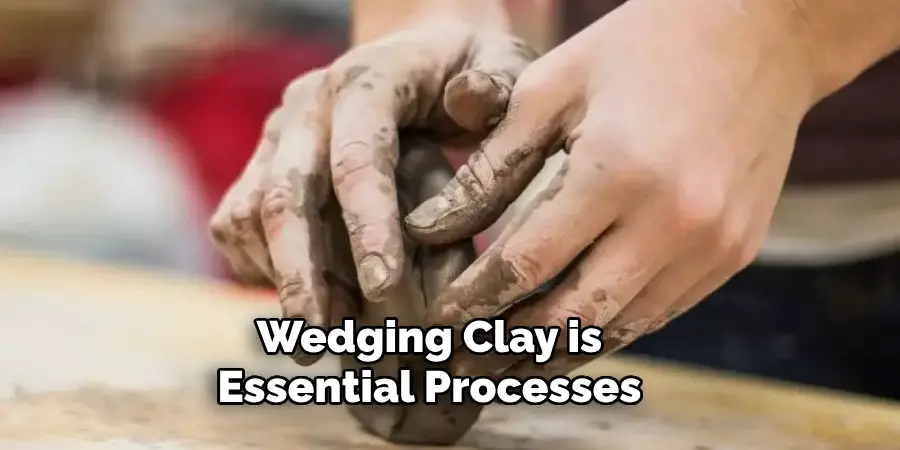
Wedging is a method used to mix the clay thoroughly, improve its plasticity, and remove air pockets trapped within the material. This technique involves cutting the clay down and repeatedly throwing and folding it onto a surface. The process not only ensures a uniform consistency but also aligns the clay particles in a way that increases workability. There are two primary wedging methods:
- Ram’s Head Wedging: This method involves pushing the clay forward and rotating it in a continuous motion, forming a shape that resembles a ram’s head. It’s effective in aligning the clay’s particle structure and is particularly useful for larger amounts of clay.
- Spiral or Cone Wedging: In this technique, the clay is formed into a spiral or cone shape. It’s done by twisting and folding the clay, which helps in achieving a highly homogeneous mixture suitable for precision work.
Kneading
Kneading is similar to wedging but is often used for smaller batches of clay or as a final step before the clay is used. The primary goal is to ensure an even moisture level throughout the clay and to make sure that no air pockets remain. Kneading is generally less intensive than wedging and resembles the process of kneading dough. It’s performed by pressing and folding the clay repeatedly, ensuring it’s ready for use without any hidden air bubbles that could expand and cause cracks during the firing process.
Both wedging and kneading are fundamental skills in the ceramic arts, requiring a degree of physical effort and sensitivity to the clay’s condition. Mastery of these techniques ensures that the clay is in optimal condition for shaping, leading to better outcomes in the final ceramic pieces. The choice between wedging and kneading, and the specific method employed, often depends on the clay type, the amount of clay being prepared, and the specific requirements of the project at hand.
Common Mistakes to Avoid
When working with clay, whether you’re a beginner or a seasoned potter, there are common pitfalls that can impact the success of your ceramic projects. Being aware of these mistakes can help you improve your technique and ensure higher quality outcomes.
- Not Properly Wedging the Clay: Skipping or inadequately performing the wedging process can lead to air pockets in your clay, which might expand during firing and cause your piece to explode. Thorough wedging ensures a homogeneous and air-free clay body, crucial for the durability of your work.
- Incorrect Moisture Content: Using clay that is either too dry or too wet can severely affect your ability to shape it and the quality of the final product. Clay that’s too dry may crumble or break, while overly wet clay can collapse or not hold its form.
- Uneven Thickness in Slabs and Coils: When hand-building with slabs or coils, maintaining uniform thickness is key to prevent warping or cracking during drying and firing. Variations in thickness can lead to uneven drying rates and stress points that may result in breakage.
- Neglecting to Compress the Bottom: Failing to compress the bottom of a thrown piece can cause S-cracks during drying or firing. Always use a rib or your fingers to compress the clay at the bottom of the pot to strengthen the base.
- Overworking the Clay: While it’s important to shape your clay to perfection, overworking it, especially on the wheel, can weaken the structure and lead to collapse. Learn to recognize when the clay has reached its limits.
- Improper Joining of Pieces: When attaching two pieces of clay, such as handles to mugs or slabs together, failing to score and slip adequately can lead to weak joins that may break apart during drying or firing. Ensure both surfaces are scored thoroughly and slip is applied generously to forge a strong bond.

Conclusion
By following these comprehensive methods for using a slab roller, ceramic artists can efficiently create uniform slabs of clay and explore a wide range of creative possibilities in pottery. Experiment with different thicknesses, textures, and forms to unlock the full potential of this versatile tool in ceramic artistry. With practice and experimentation, you’ll discover new techniques and applications to enhance your pottery-making process and create unique, personalized works of art. Be sure to follow all instructions on how to use a slab roller carefully, and always consult an expert when in doubt.
About the Author
Adrien Rowe, an expert in knitting, fiber arts, and bookbinding, promotes sustainability and creativity through workshops and tutorials. Passionate about education and community, he inspires crafters of all levels to learn, share, and grow in a supportive, idea-driven environment.
Professional Focus
Specializes in advanced knitting techniques, fiber manipulation, and textile innovation.
Expert in book arts, including cotton papermaking, handmade paper techniques, and bookbinding.
Dedicated to educating and inspiring crafters of all skill levels through tutorials, workshops, and hands-on learning experiences.
Passionate about creating a supportive community where makers can share ideas, learn, and grow.
Education History
Rhode Island School of Design (RISD) – Bachelor of Fine Arts (BFA) in Textiles.
University of Iowa Center for the Book – Master of Fine Arts (MFA) in Book Arts.
Expertise:
Advanced knitting, fiber manipulation, papermaking, bookbinding, sustainability-focused crafting, educational workshops, creative tutorials, and fostering a supportive maker community.